Magic Cast On
A provisional cast on for tubular knitting
This is my slip-knot free version of Judy’s Magic Cast On, a two-directional provisional cast-on great for starting toe-up socks and other tubes with one closed end.
You can use two circular needles, or two double-pointed needles (dpns), as I did here.
How to do it:
Text included in the images is written out below each step to make this Low Vision Accessible. Instructions on the images are for right-handed people. Instructions in the written text is non-hand specific.
Basic Principle:
You will be creating a series of loops alternating between two needles with an interwoven “purl bump” ridge on one side for stability.
This photo tutorial shows Continental/European style (working yarn held in left hand). English/American style uses the same instructions except your working yarn is held in your right hand.

Step One:
Hold two double-pointed needles in your dominant hand with a small gap between them. The needle furthest from you (or on the top) will be Needle One, and the one closest to you (or on the bottom) will be Needle Two.
Drape tail of yarn through the needles from the body side over Needle Two. Leave a longer tail than you normally would—about three times as long as your cast-on section will be, plus a few inches as buffer.
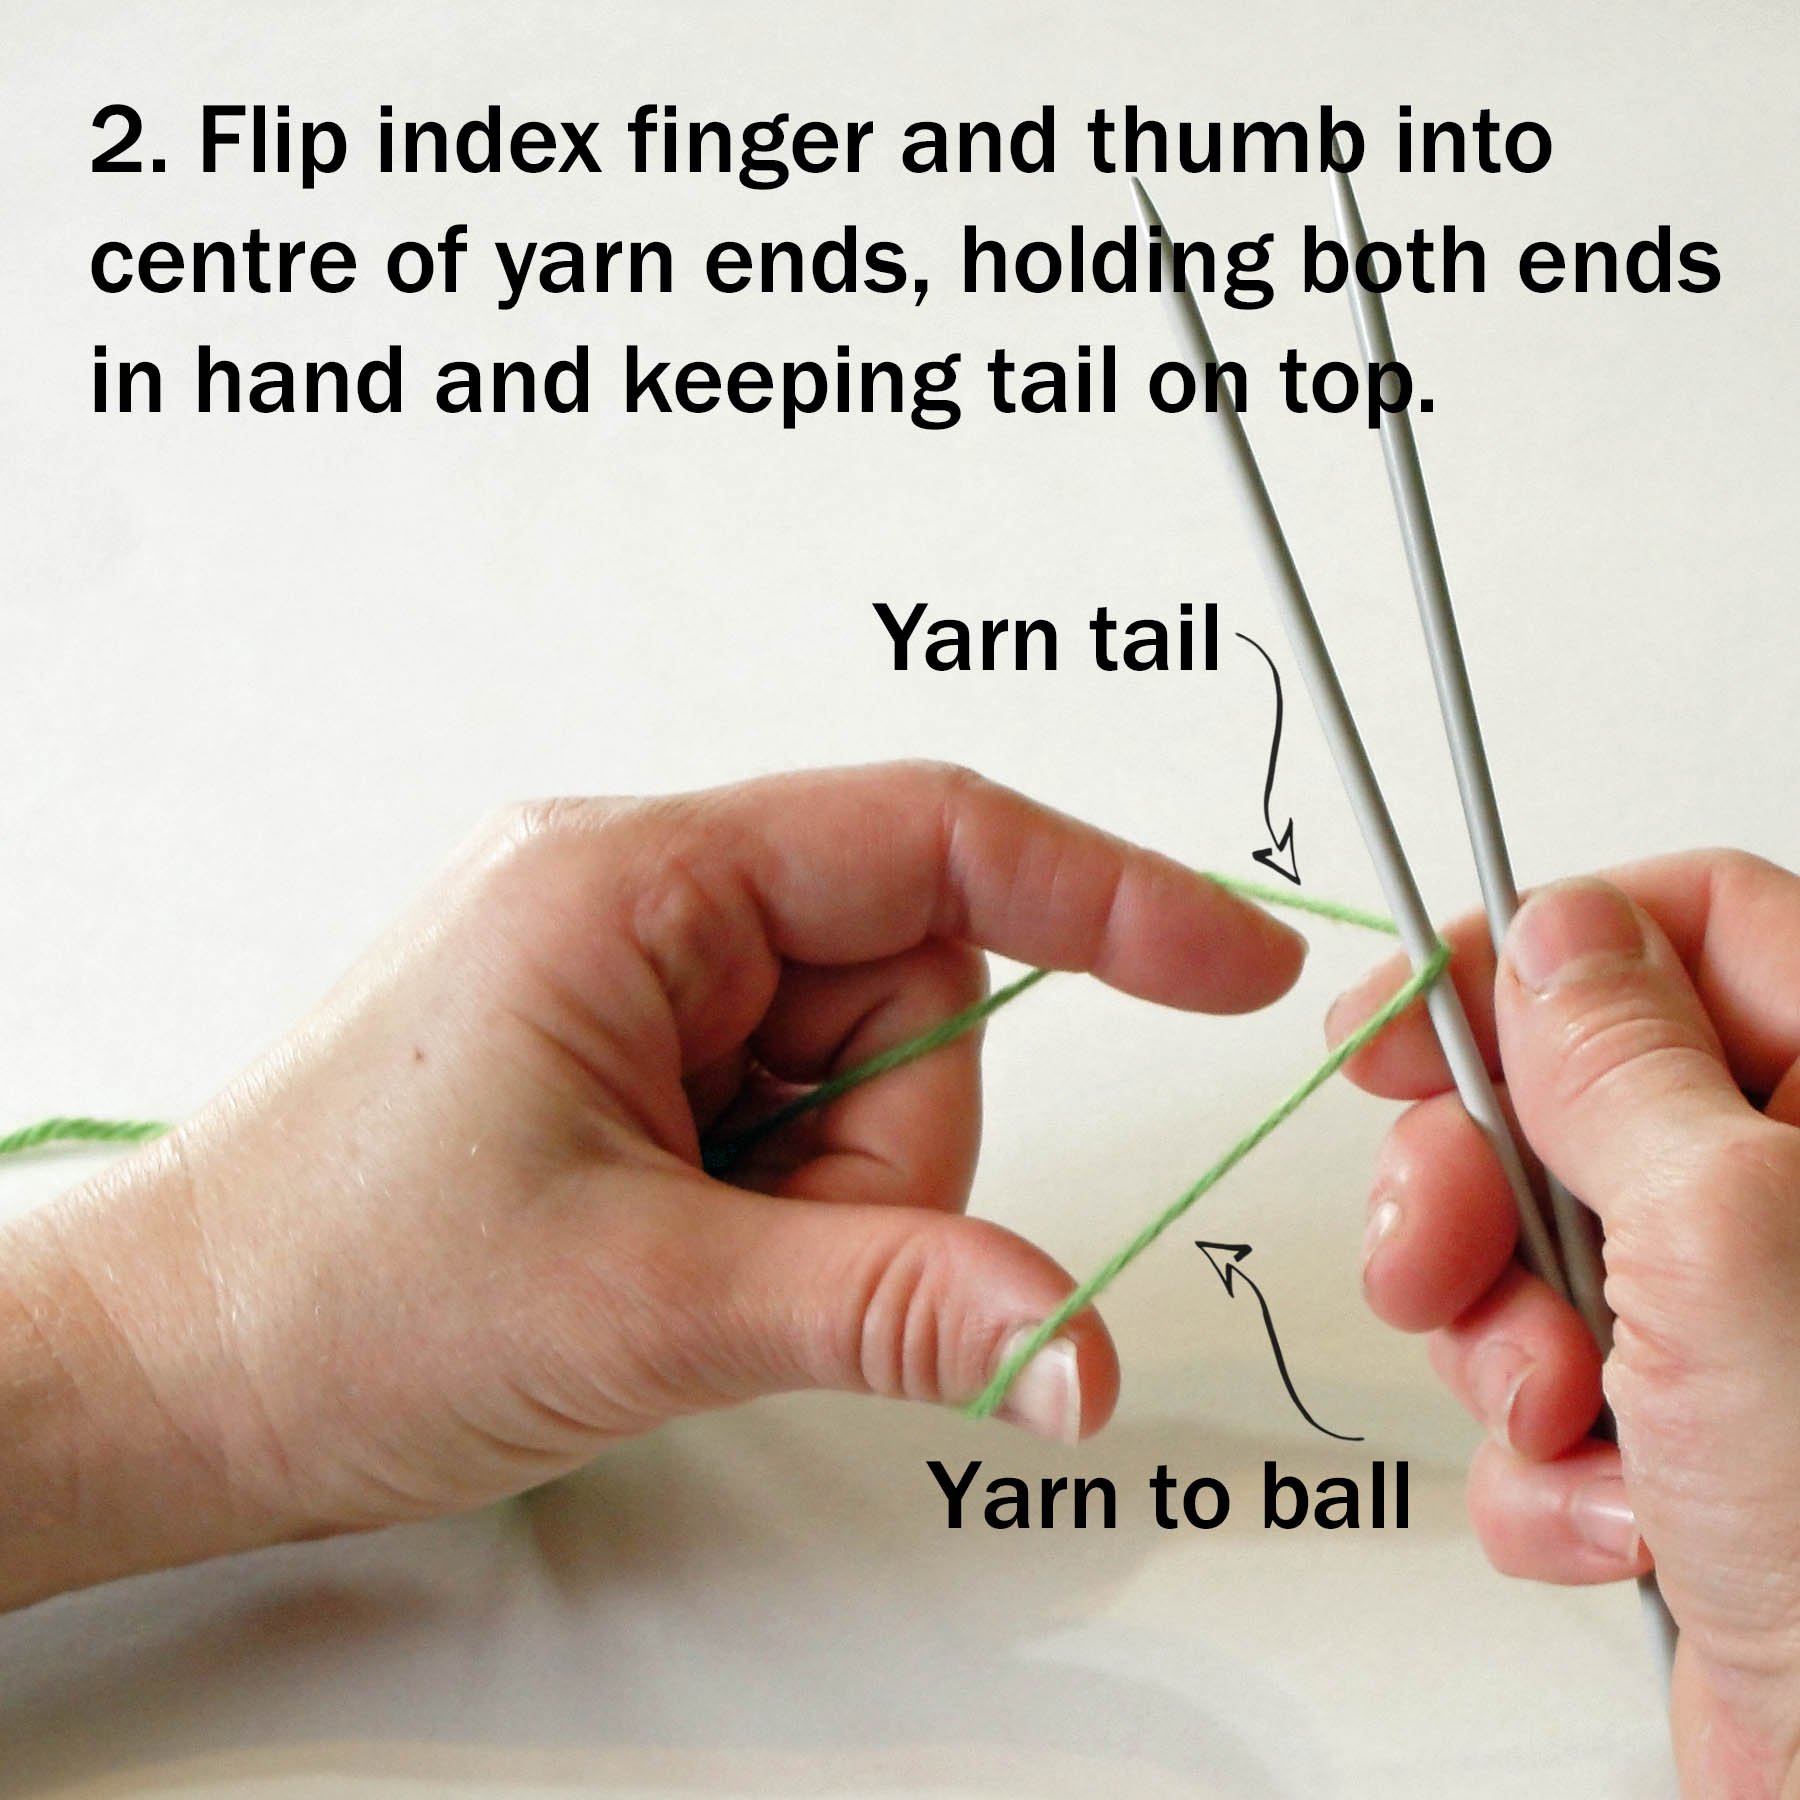
Step Two:
Grasp the tails of the yarn in your non-dominant hand, pressing them against your palm with your fourth and fifth fingers (ring finger and pinky finger) with the ends hanging toward your wrist. Insert your thumb and forefinger between the two yarn tails under the needle, then widen to form a U.
Keep yarn taut throughout using the fingers pressing the tails to your palm.

Step Three:
Move both needles tips toward your body, over the yarn hooked over your thumb. (The yarn is still only around Needle Two.)
Move the needle tips down and under the strand on the thumb so the yarn is coming up behind Needle One.
Then wrap the thumb yarn down between the two needles so it is around Needle One and sinking through the gap between the needles. (An alternative way to think of this is moving the needle tips so Needle One goes under and around the thumb strand, then up again, so the yarn wraps around Needle One and goes down into the gap between the needles.)

Step Four:
Tighten and return to starting position, with your non-dominant thumb and index finger separating the two strands of yarn coming from the needles.
There is now one stitch on each needle, and your yarn will be coming from Needle One.

Step Five:
Move both needles over yarn on forefinger, then move Needle Two under and up on the inside of the finger strand, wrapping the yarn over it and down between the two needles.

Step Six:
Tighten up the stitch, but don’t pull it too close to the previous stitch. In general, a gap about the same width as your yarn is enough.

Step Seven:
Repeat steps Three to Six until you have the desired number of stitches on each needle. Make sure there are the same number of stitches on each.

Step Eight:
Starting at the beginning of Needle Two, knit your first round. When you get back to Needle One, knit into the back loops on your FIRST round only.
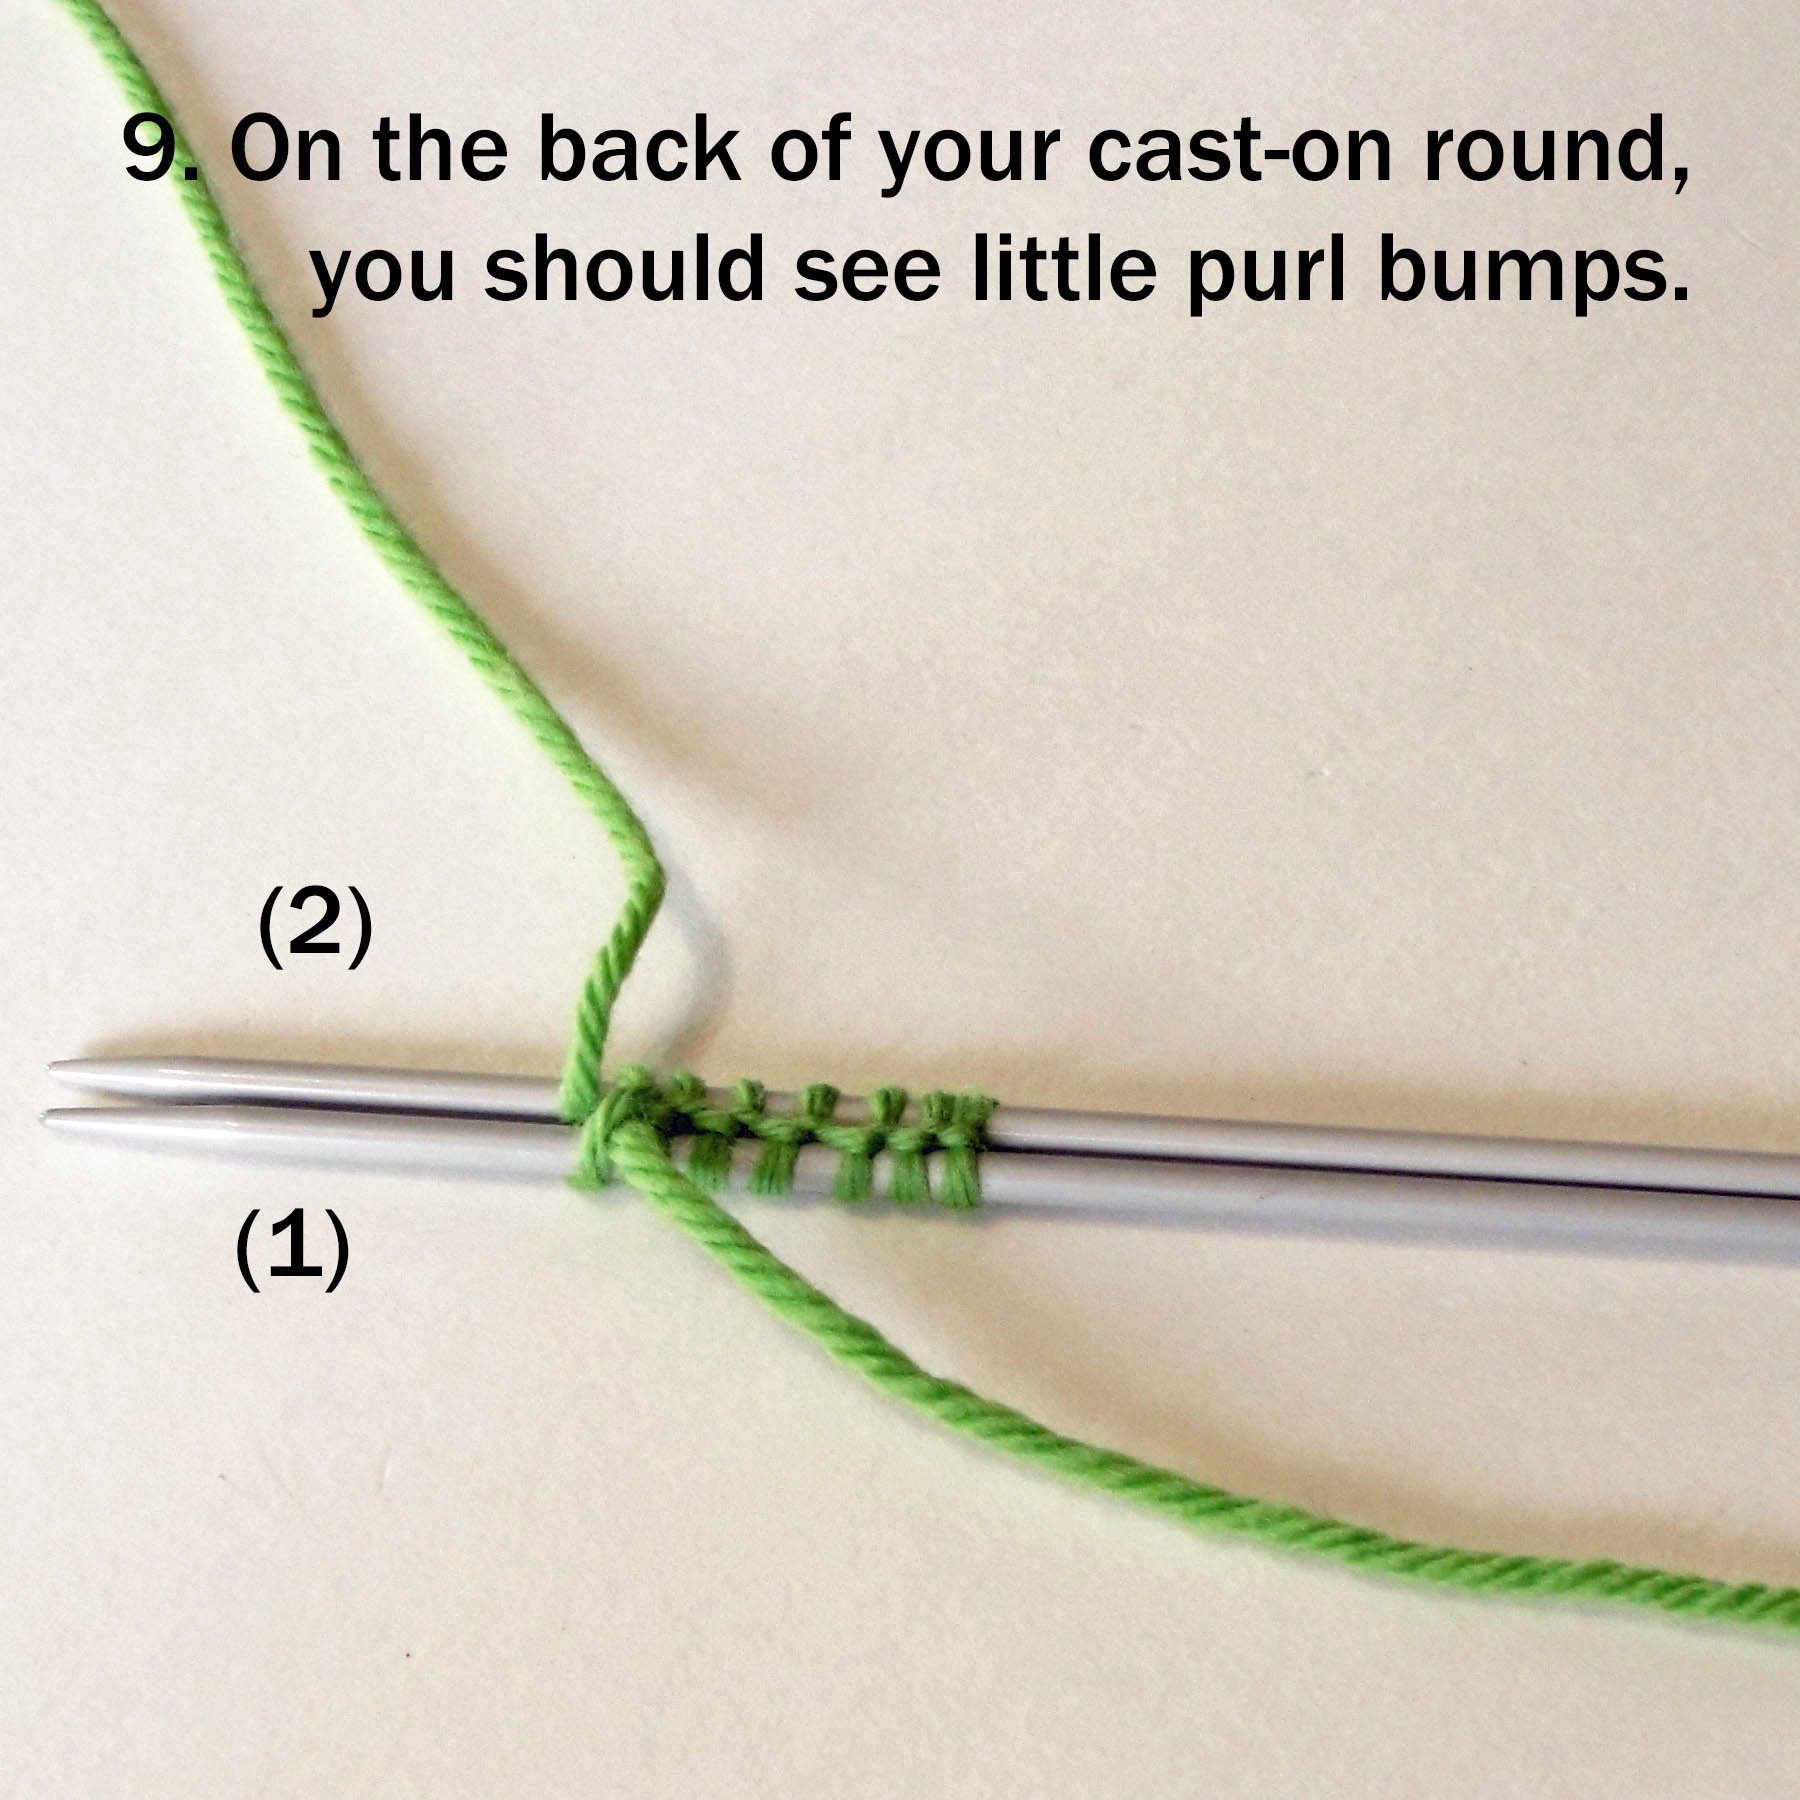
Step Nine:
You should see a ridge of little purl bumps on the back of your cast-on round.