Right-Leaning Bar Increase
This is the mirror image of the KFB or K1FB (Left-leaning Bar Increase) used to shape knitting.
This common increase can be used in a variety of situations, from one side of a thumb gusset, to knitted lace, to top-down raglan shaping, and more.
This is the mirror-image increase to the k1fb / kfb (knit one in the front and back loop of the same stitch) increase. While that increase creates a little bar that wraps around the bottom of the left stitch, allowing the right stitch to continue the column of knit stitches, this increase wraps the bar around the stitch on the right side.
I have not found a common abbreviation for this increase, so I refer to it as the BincR (Bar Increase Right).
Note that if you are left-handed and knitting in mirror-image, this will be a Left-leaning bar increase, but will still create the opposite look of the kfb / k1fb.

How to do it:
Text included in the images is written out below each step to make this Low Vision Accessible. Instructions on the images are for right-handed people. Instructions in the written text is non-hand specific.
Basic Principle:
You will be increasing one stitch by knitting twice into the same stitch, but the bar will be on the right of the stitch you knit into instead of the left as with the KFB.

Step One:
Slip the stitch from stitch-holding to working needle knitwise. (Righties: From left to right. Lefties: From right to left.)
Then slip the stitch back onto the stitch-holding needle purlwise. (In other words, don’t twist it when you put it back, just move it straight across.)
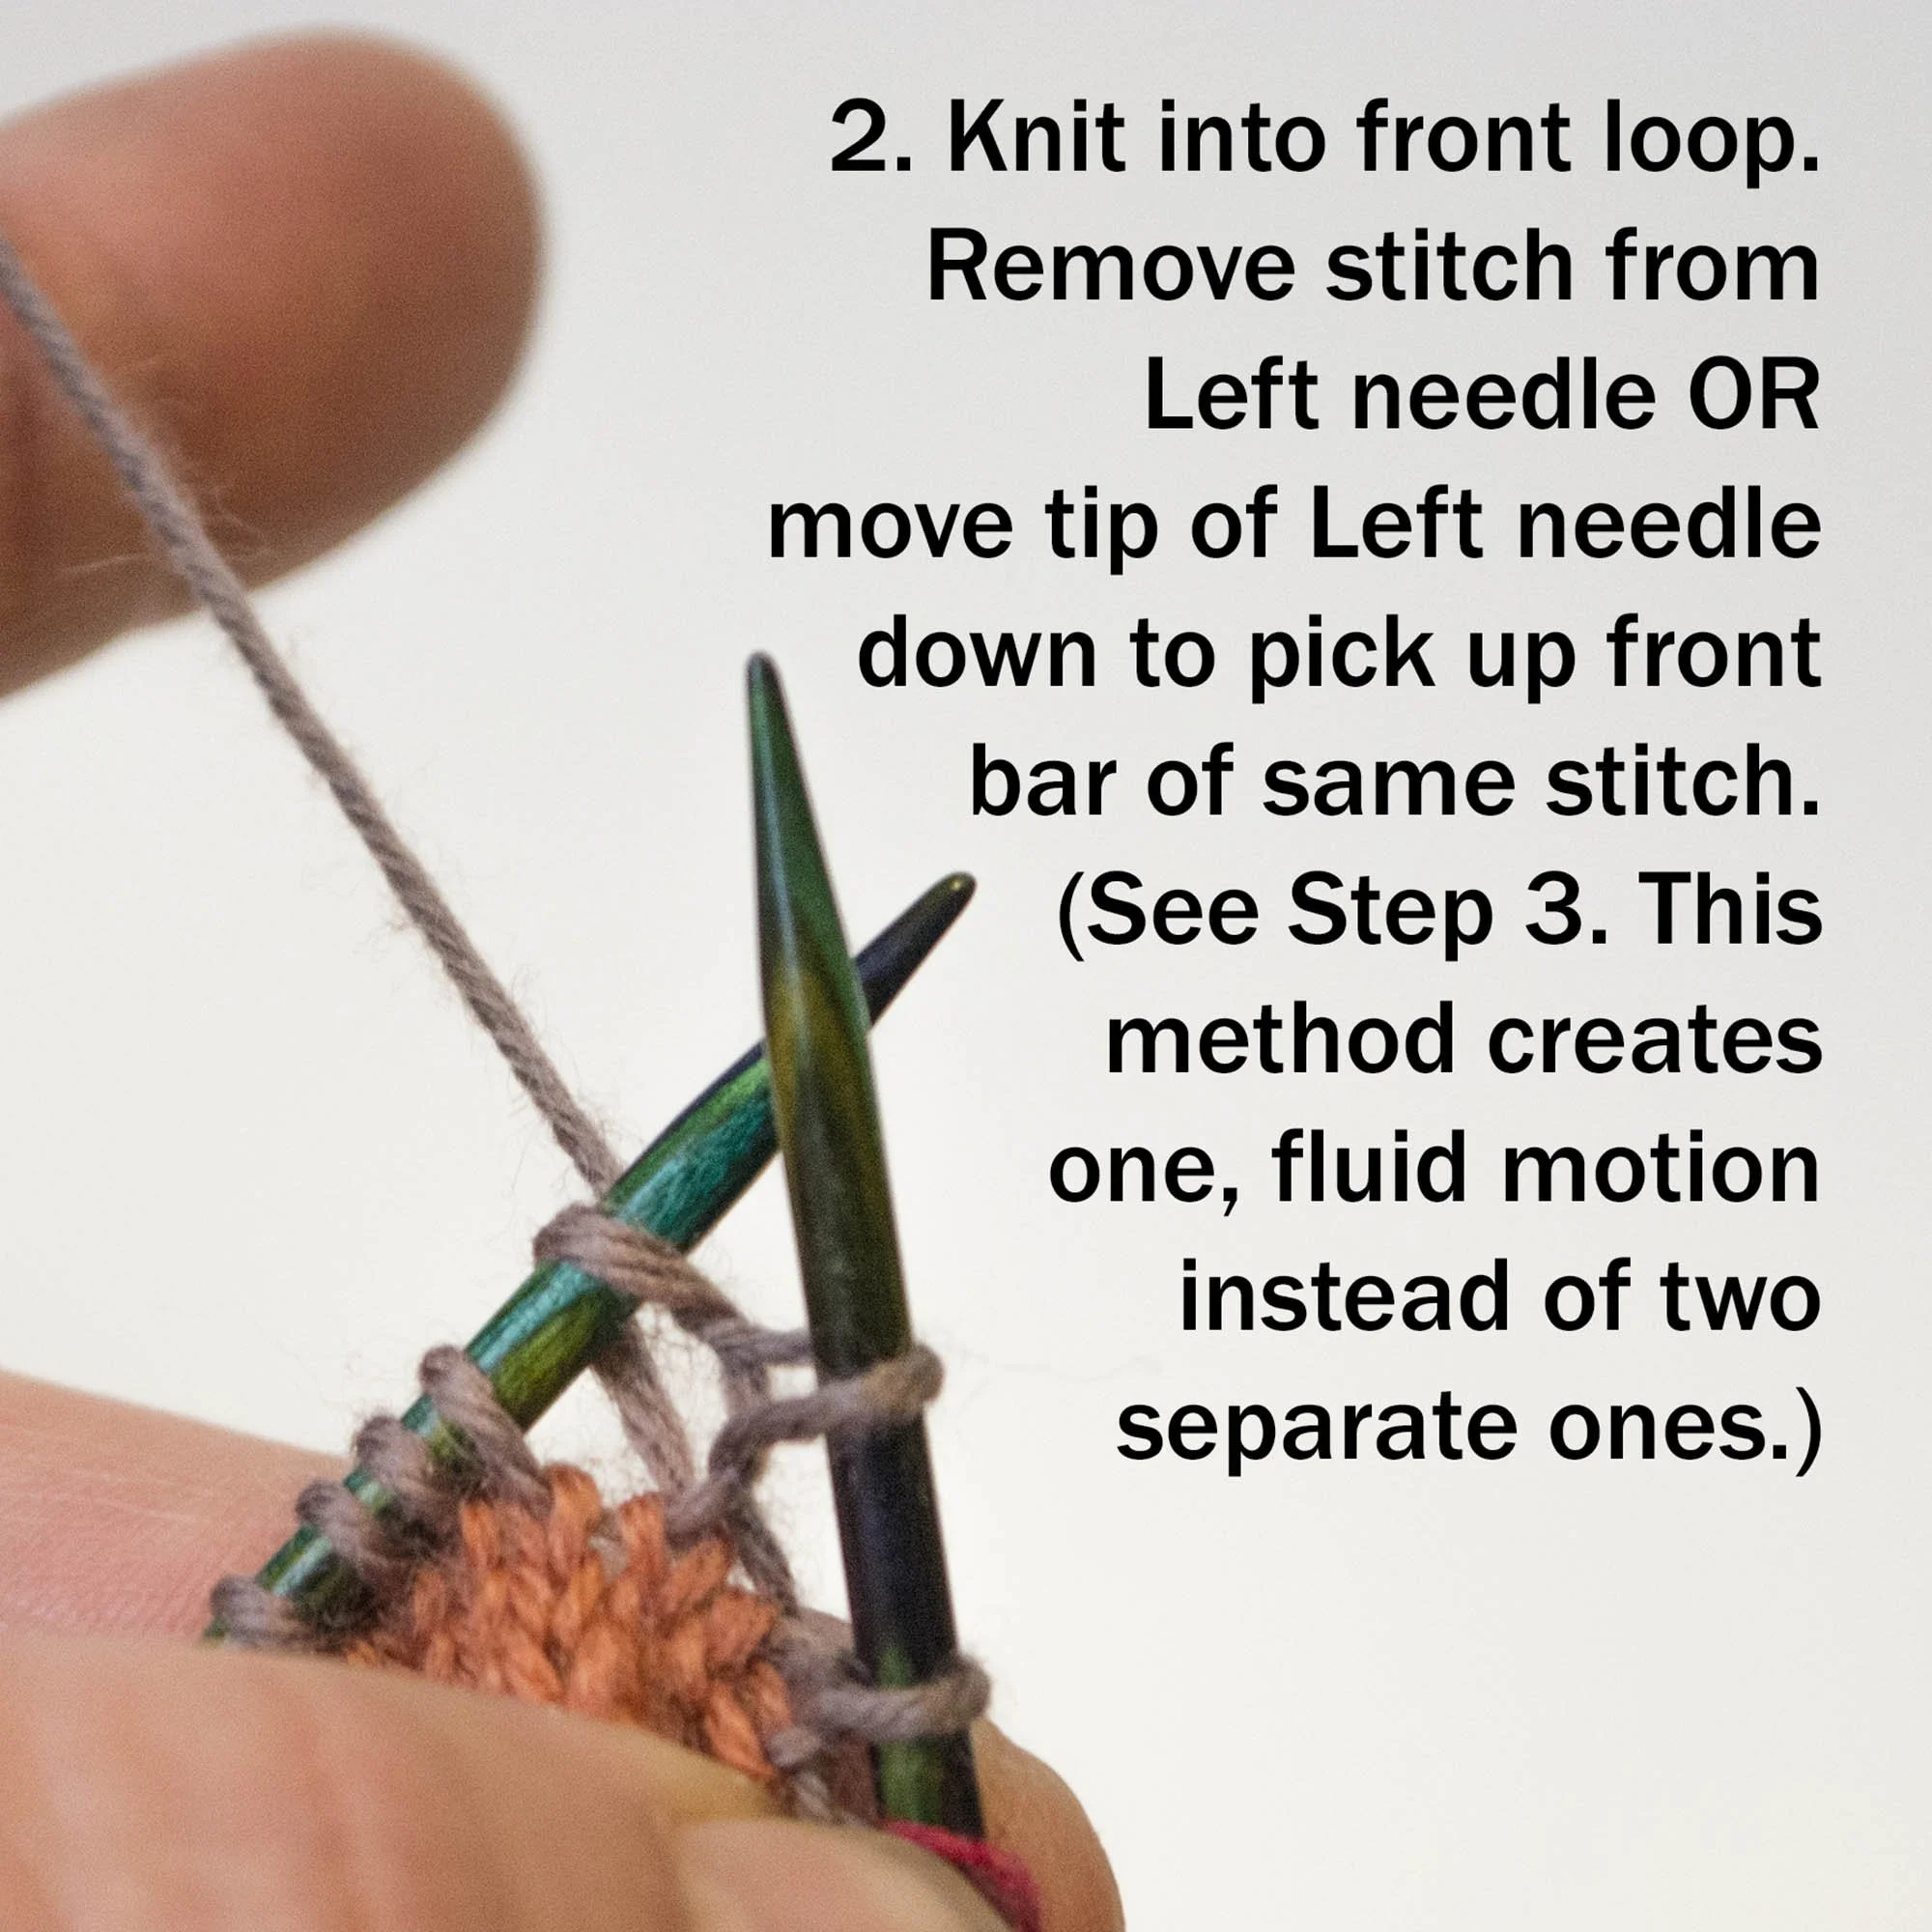
Step Two:
Knit into the front loop of the stitch.
Use working needle to remove stitch from stitch-holding needle.
OR
Move tip of stitch-holding needle down beneath the working needle and toward your body to pick up front leg of same stitch you just knit into as the next stitch to work into. This is essentially just moving your left needle from the back of the stitch it’s already in to the front. (See Steps Three and Four. This method creates one fluid motion instead of two separate ones. Work it the other way several times first to get the hang of it.)
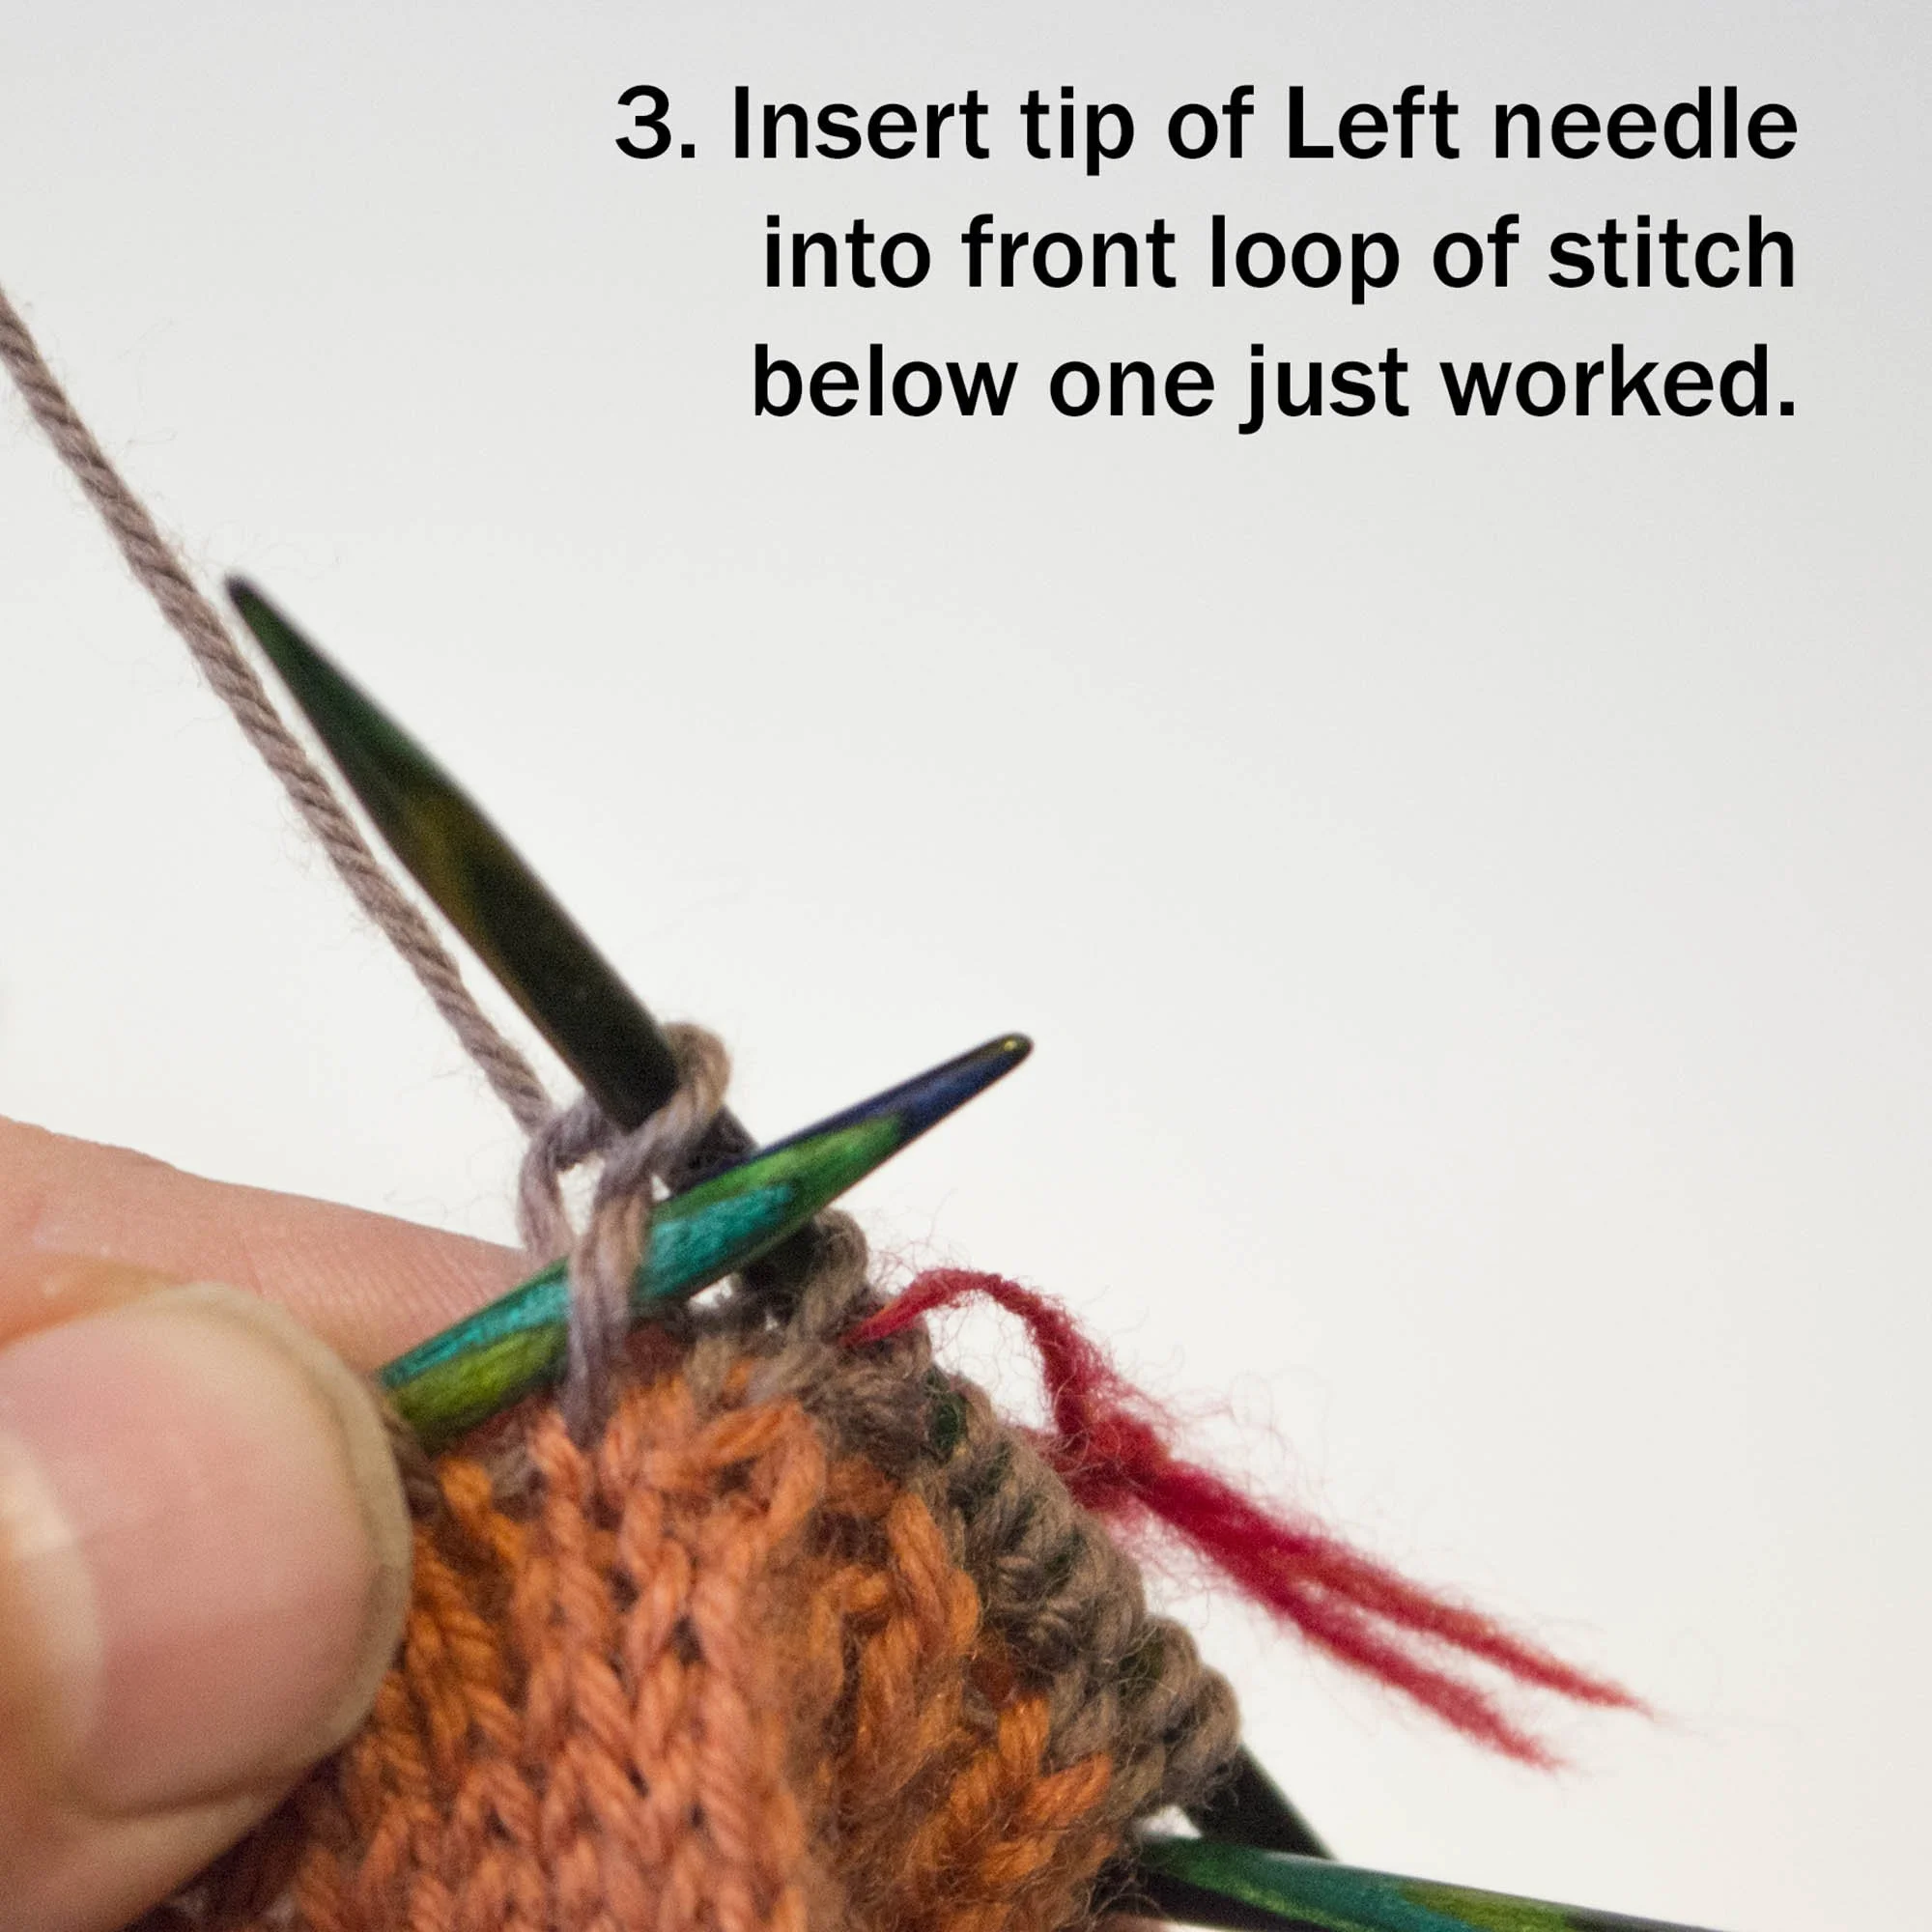
Step Three:
Insert tip of stitch-holding needle into the front loop of the stitch you just knit into, which is now in the row below the one you just worked on the working needle (in your dominant hand).

Step Four:
Pull front loop of this stitch up so it forms a stitch on the stitch-holding needle (non-dominant hand).

Step Five:
Knit into the back loop of the stitch on the stitch-holding needle.
Note that the stitch you are working into has already been worked into once, and that first stitch is on the working needle already.

Step Six:
Remove stitch from stitch-holding needle. Your completed increase stitch is on the working needle. The outside (near the tip of the needle) of the newest stitch should line up with the column below it.
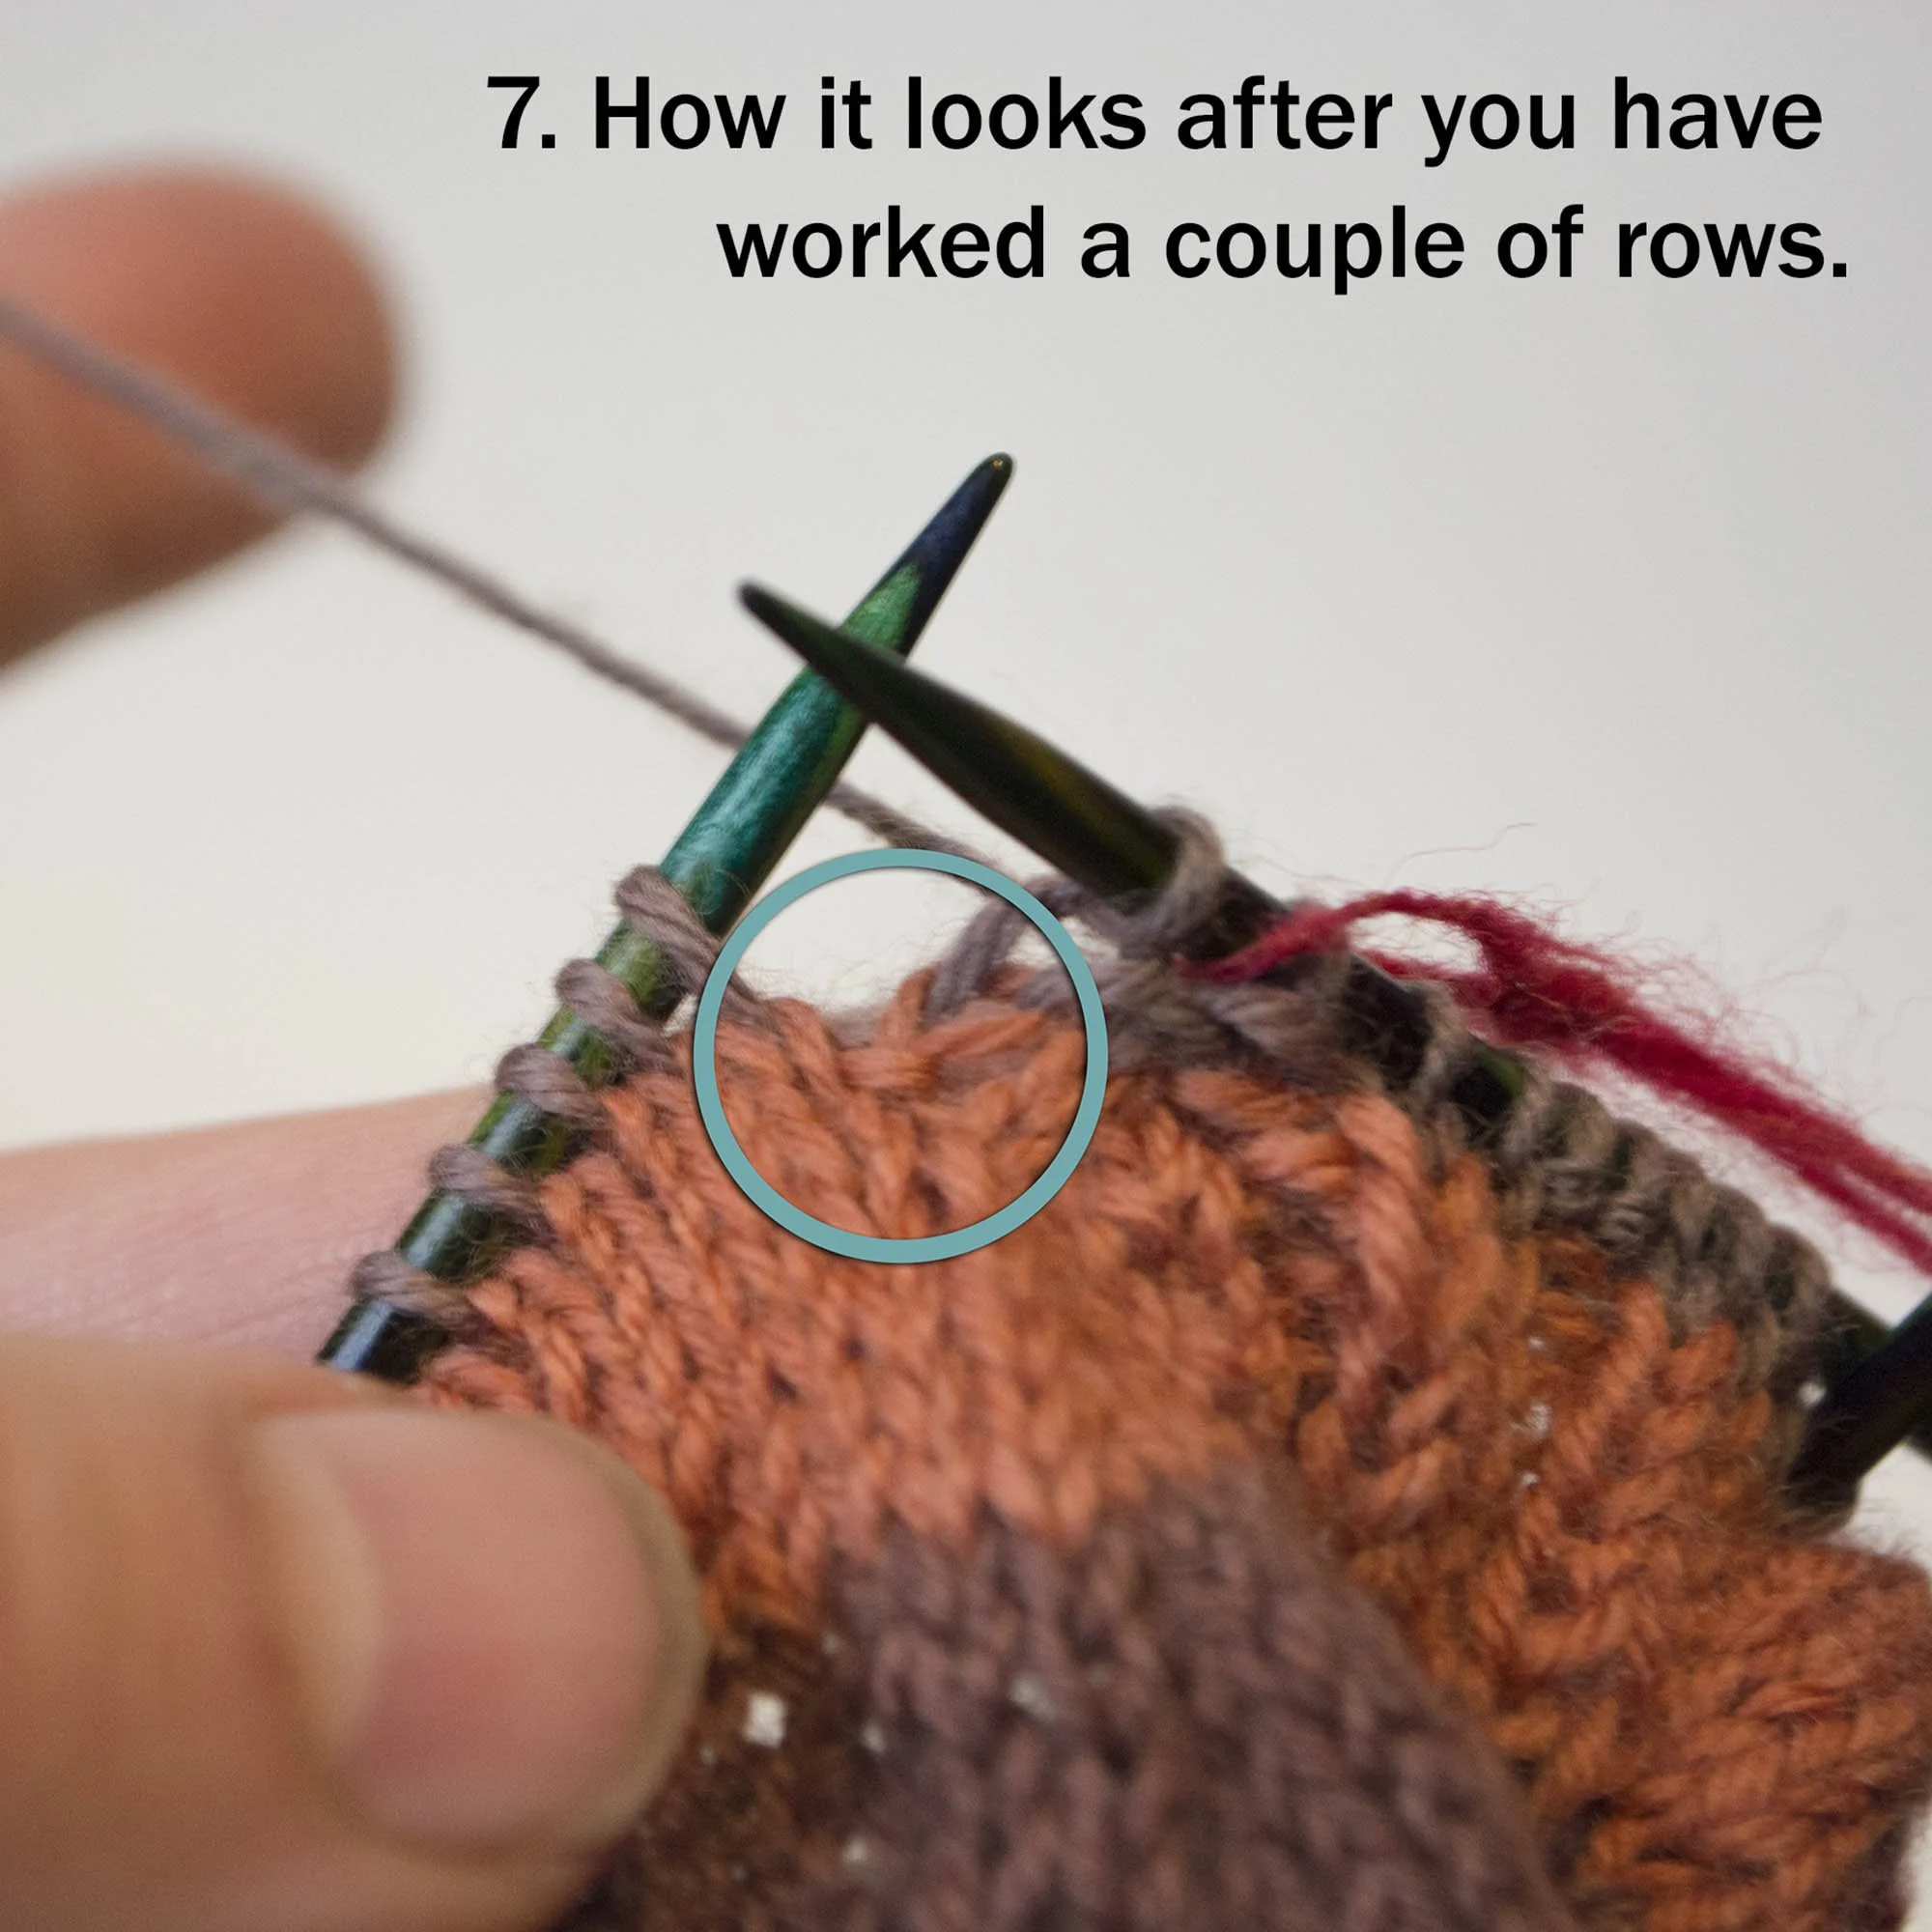
Step Seven:
How the bar increase looks after you have worked a couple of rows. There is a bar wrapping around the column of stitches where the increase occurred.