How to Knit
Lesson Twelve: How to Finish Your Knitting Project
Finishing
When creating clothing, whether by knitting or in other disciplines such as sewing or crochet, it’s the finishing work that truly shows the skill of the creator. (The same can be said for many art forms.) A little patience can turn your project into a couture-worthy piece.
First, choose the bind off that is best suited for your project type. (Not all patterns will give you a recommendation. In that case, spend a little time researching on the Internet.) Then you’re ready to weave in your ends.
Weaving in Ends
When finishing, always take great care in weaving in your ends neatly on the wrong side of the project.
For a project like the Building Blocks Cowl & Hood (with good structure and simple stitches), use your yarn or tapestry needle and “follow the yarn path” on the back of the work, weaving along the same path that the yarn took to make the stitches for one or more inches. This will also help you understand the method for working Kitchener Stitch, a bind off that grafts two sets of live stitches together, as you begin to see how the stitches link.

As you can see from the back side of the button band on this Baby Mandarin Jacket, proper finishing means you can’t even tell where the ends of your yarn are. (Orange ends were woven in on the top right corner.)
Blocking
When you create a project with natural fibres, you can use the properties of those fibres to help reshape your pieces or project using water or steam. This process is called blocking. Blocking can even out stitches, open up cables, or reshape a piece with imperfect gauge to where it is meant to be. Some types of projects should always be blocked (such as sweaters), and others are more optional.
You’re already doing a form of blocking when you lay your sweater flat to dry. Letting a sweater dry on a hanger will inevitably leave it stretched out and oddly shaped. Essentially, doing that is still blocking—just not used to your advantage.
Blocking can really only be done on natural fibres. Wool, alpaca, cotton, linen, and most other natural fibres have innate “memory” that can be manipulated to shape when wet. Synthetic fibres such as acrylic don’t have the same structure, and blocking has little to no effect—although you can use steam to “kill” acrylic and give it more drape. This is an irreversible process, however, so use wisely.
To wet-block, wet your finished project (or project piece) in a bowl of cool water (to which you could also add some wool wash, if you desire). Wring it out by laying on a towel and rolling it up to remove excess water. You may need to do this more than once. Pin the project on a flat surface or blocking mat to the required dimensions. Let dry. See the video below for more tips.
To spray-block, pin your project to the required dimensions on a flat surface or blocking mat. Then use a spray bottle to dampen the project thoroughly. Finger-press cables or other patterns to open them up, if necessary. Let dry completely before removing the pins.
To steam-block, pin your project to the required dimensions on a flat surface or blocking mat. Turn on the steam setting on your iron and move it evenly over your project an inch or so above it without touching the iron to the fabric. Use your fingers to press open cables. Let the project dry thoroughly before removing pins. (For smaller projects like hats and mittens, you could just finger-press the patterns and projects without using pins, as shown in the second video below.)
Tools to help with blocking:
Blocking mats: Interlocking foam mats that are rigid enough to hold their shape and can be pinned into without marring another surface. If you don’t have blocking mats, use a spare bed, an ironing board, or a clean rug. Note that while you can buy blocking mats from knitting supply stores, you can usually find the exact same product, just less pretty (and far more affordable), in a hardware store under “no-slip flooring mats.”
Blocking pins: These pins are rustproof to withstand the rigours of wet blocking, and they have little T shapes at the top for easy maneuvering. Other types of straight pins (like sewing pins) work just fine too.
Blocking forms: The most popular blocking forms are sock blockers or head forms for blocking hats. You can block without them, but, especially with socks, the forms turn out a result that is difficult to get another way. (Though you can use your own clean feet to block socks if you have a reclining chair, a good book, a cup of tea, and a strong bladder. Start from damp, not wet.)
Spray bottle, towel, ironing board and iron, or other tools specific to your chosen blocking method.
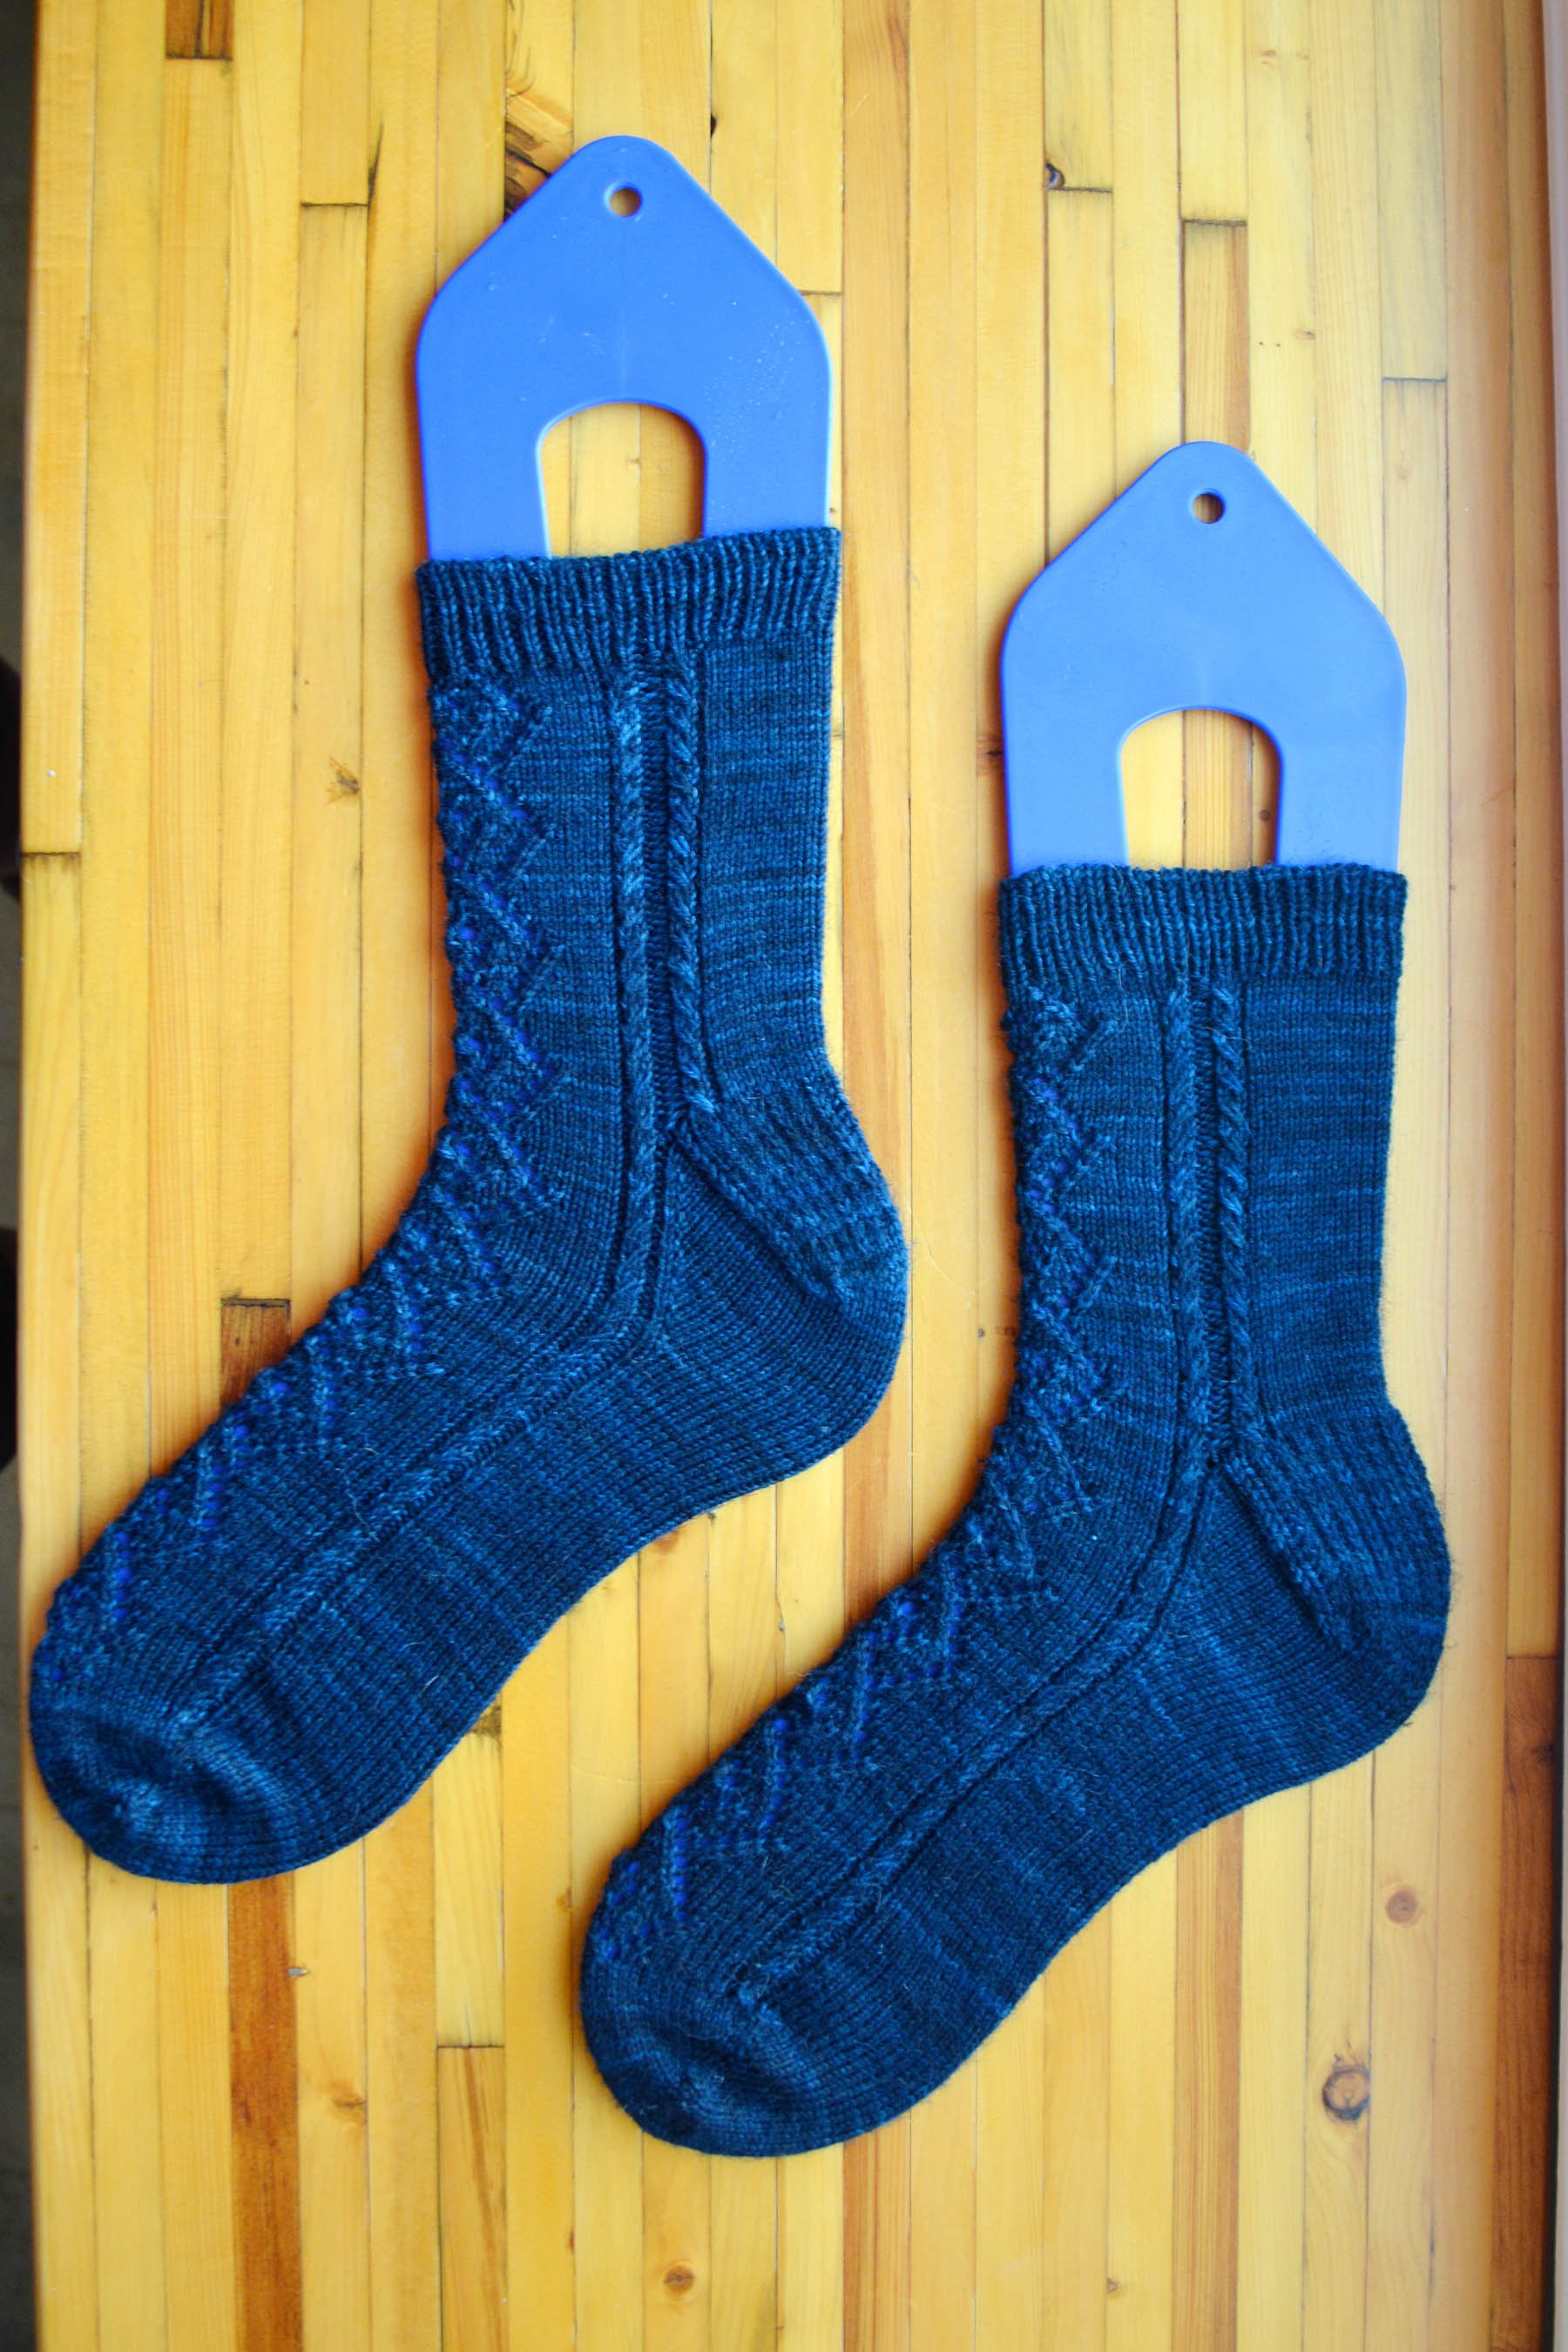
These socks have been soaked and placed on plastic sock forms to dry. See how defined the lace and cables and other textures are? Once the forms are removed, the socks will maintain this shape.
This video from Knit Picks demonstrates all three types of blocking:
You could use the following method for hats and smaller projects:
Application Point
While most people don’t feel the need to weave in ends on a gauge swatch, you could do so for practice. If you’re making another type of project, weave in your ends now.
Then block the gauge swatch or project using one of the methods above.
Congratulations! Your project is complete!