Kitchener Stitch (or Grafting)
Graft two sets of live stitches together for a seamless join
This bind off uses a yarn or tapestry needle to create a row of stitches between the stitches on two parallel needles. This is used for the toes of socks, tops of mittens, seamless shoulders, and any other place where you want two sets of live stitches to be seamlessly woven together.
(Note: If you’re looking for the Kitchener Bind Off to finish a ribbed edge, see this page.)

How to do it:
Text included in the images is written out below each step to make this Low Vision Accessible. Instructions on the images are for right-handed people. Instructions in the written text is non-hand specific.
Basic Principle:
You will be using a needle and the yarn tail to create the yarn path of stitches to seamlessly bind off two sets of live stitches.
Rules of Formation
At first, Kitchener Stitch can seem daunting, but it is very easy once you understand that if always follows basic principles.
Since you are mimicking worked stitches, remember that the yarn needle must go into each stitch on your knitting needle twice, once in each direction, because there are two “legs” in each loop/stitch.
Analyze the stitch you are about to enter: are you looking at the knit "V" or the purl "bump"? Plan your entry and exit from that stitch based on whether it is a "knit" or "purl" stitch.
The first time through the stitch, enter it the opposite direction that you would work it for the type of stitch.
The second time, enter it the same way you would work it for the type of stitch, then slip it off the needle.
For example, when you are grafting between two pieces of Stockinette Stitch with the wrong sides together, it seems you are looking at a front layer that is ready to be knit and a back layer that is ready to purl. The first time you go into a stitch on the top (knit) layer, enter it purlwise (opposite). The second time, enter it knitwise (same) and slip it off the knitting needle.
For the back (purl) layer, the first time you enter the stitch, enter it knitwise (opposite), and the second time enter it purlwise (same) and slip it off the knitting needle.

Step One:
Hold the needles with the live stitches to be grafted parallel to each other with your working yarn on the outer edge (away from your hand). Working yarn should be coming from the back stitch.
Trim working yarn at about three to four times the width of the finished edge you will be binding off. Feed yarn tail into a yarn or tapestry needle that is the appropriate size for your project.

Step Two:
The back stitch that has the yarn tail can be considered to already have been entered by your grafting needle once according to the Rules of Formation above. (Or, for experienced grafters and an even more tidy graft, you can ignore that and enter it twice as you would for subsequent stitches that we graft. For beginners, proceed as directed in this tutorial.)
Using your yarn needle, enter the first stitch on the front needle purlwise. Pull through. (This is the orientation you use to enter knit-facing stitches the first time while grafting.)

Step Three:
Enter the first stitch on the back needle purlwise. (This is the orientation for the second entry into a purl-facing stitch while grafting.)
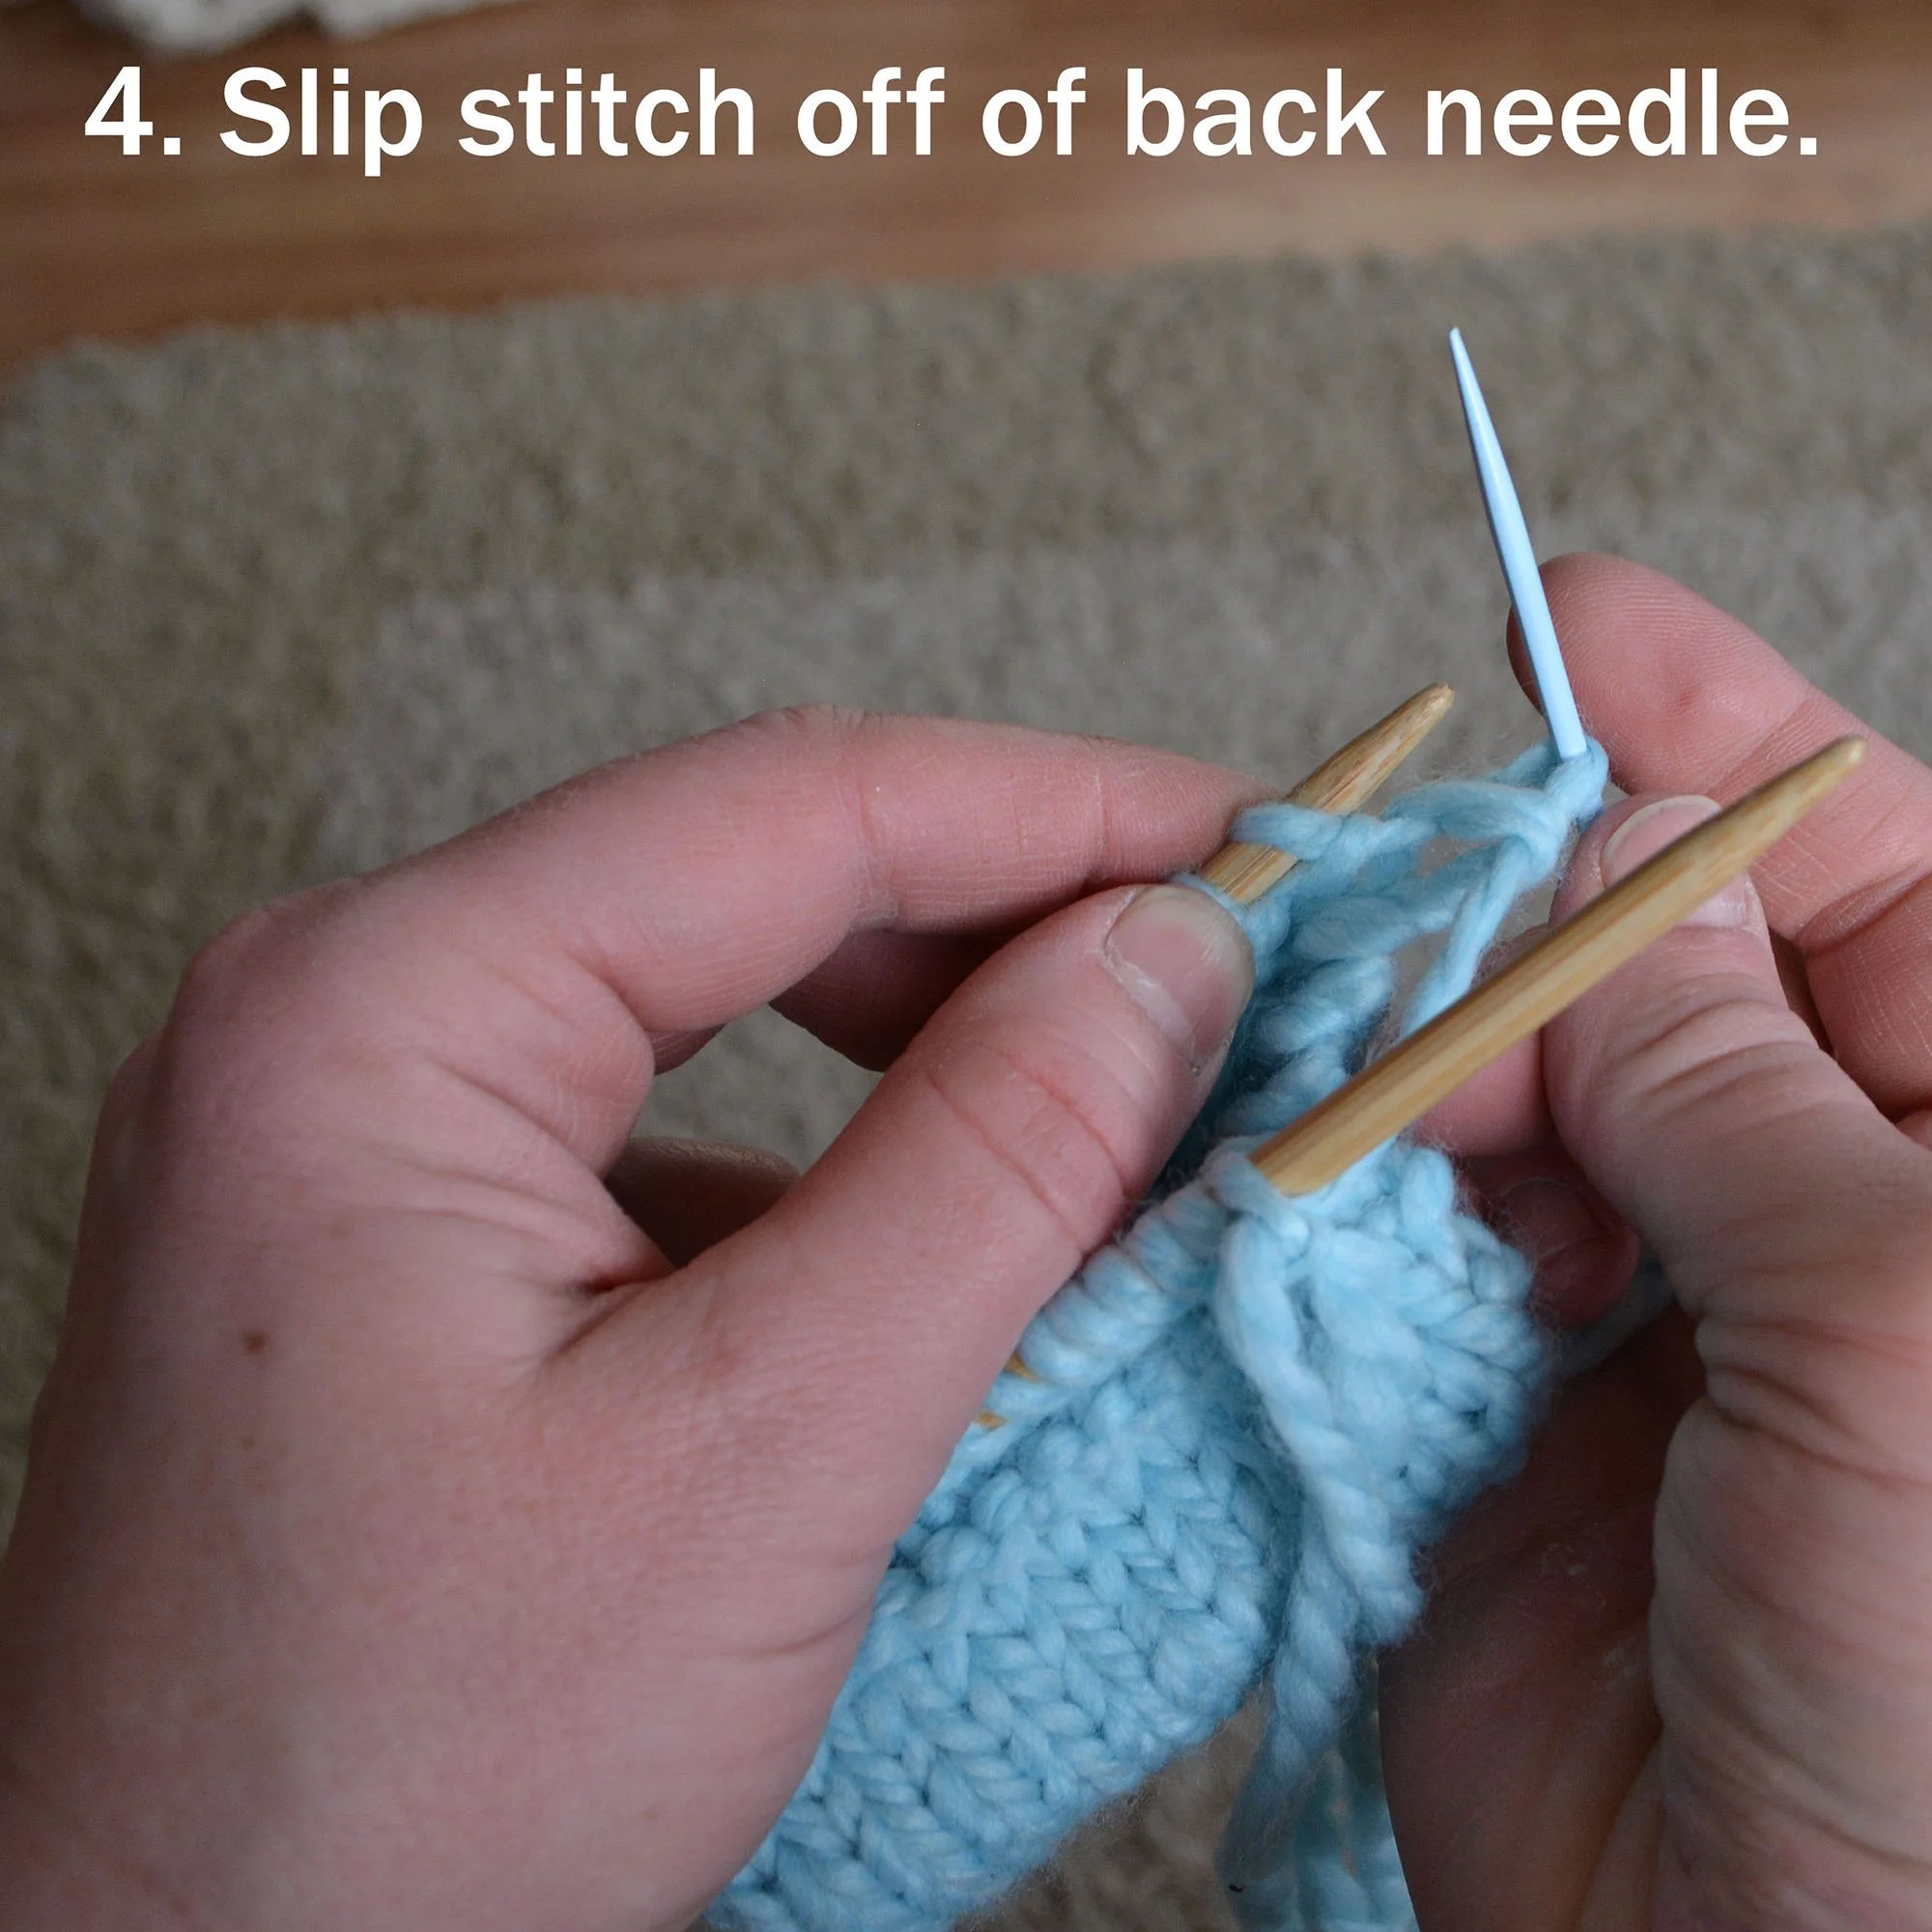
Step Four:
Without pulling the yarn through, use your yarn needle to slip the stitch off the back needle.

Step Five:
Enter the next stitch on the back needle knitwise. (This is the orientation for the first entry into a purl-facing stitch.) Pull yarn through and snug up the slack.

Step Six:
Enter the first stitch on the front needle knitwise without pulling yarn through. (This is the orientation for the second entry into a knit-facing stitch.) Use your yarn needle to pull the stitch off the knitting needle.

Step Seven:
Enter the next stitch on the front needle purlwise. (This is the orientation for the first entry into a knit-facing stitch.) Pull yarn through and snug up the slack.

Step Eight:
Keep working steps three through seven until you have bound off all stitches. Weave in remaining end on wrong side of fabric. Work to have an even tension with your bound off stitches so they mimic the look of stitches created with knitting needles.