Purl Stitch
Make “the other knitting stitch” in Continental or American style
Purling is working a knit stitch in reverse, so the bump faces you and the V is on the back. That may not make sense now, but it will after you have worked a few rows of alternating knit and purl stitch and see how each side of the fabric looks.
Continental Style holds the working yarn in the non-dominant. American Style holds the yarn in the dominant. These are colloquially known as picking and throwing, respectively, for the type of action they require. Picking is easier on the hands and can be done much faster once you are proficient.
Note: This tutorial also appears in my How to Knit series.
How to do it:
Basic Principle:
With the working yarn in front, you will be using two needles to create a series of loops, which are the foundation for the stretchy properties of knit fabric.
Rules of Formation
Choose whether you want to try the Continental or American style of holding your yarn, then get to work learning the purl stitch.
Whether you’re working in Continental or American style, the purl stitch has the same rules of formation:
Working yarn (the yarn you’re making new stitches with) goes in front of the needles
Working needle (in dominant hand) is inserted into the first stitch on the non-working needle from tip end to back end through front leg of stitch
Working yarn goes from the tip end of the non-working needle to the back end, top to bottom between the needles
Finished stitch should have the leg of the stitch that’s closest to your dominant hand in the front of the working needle
Continental-Style Purl Stitch
Jump to American-Style Tutorial
In Continental Style, the working yarn is held in your left hand. Holding it in such a way as to achieve correct tension is key. Please see Holding the Yarn.
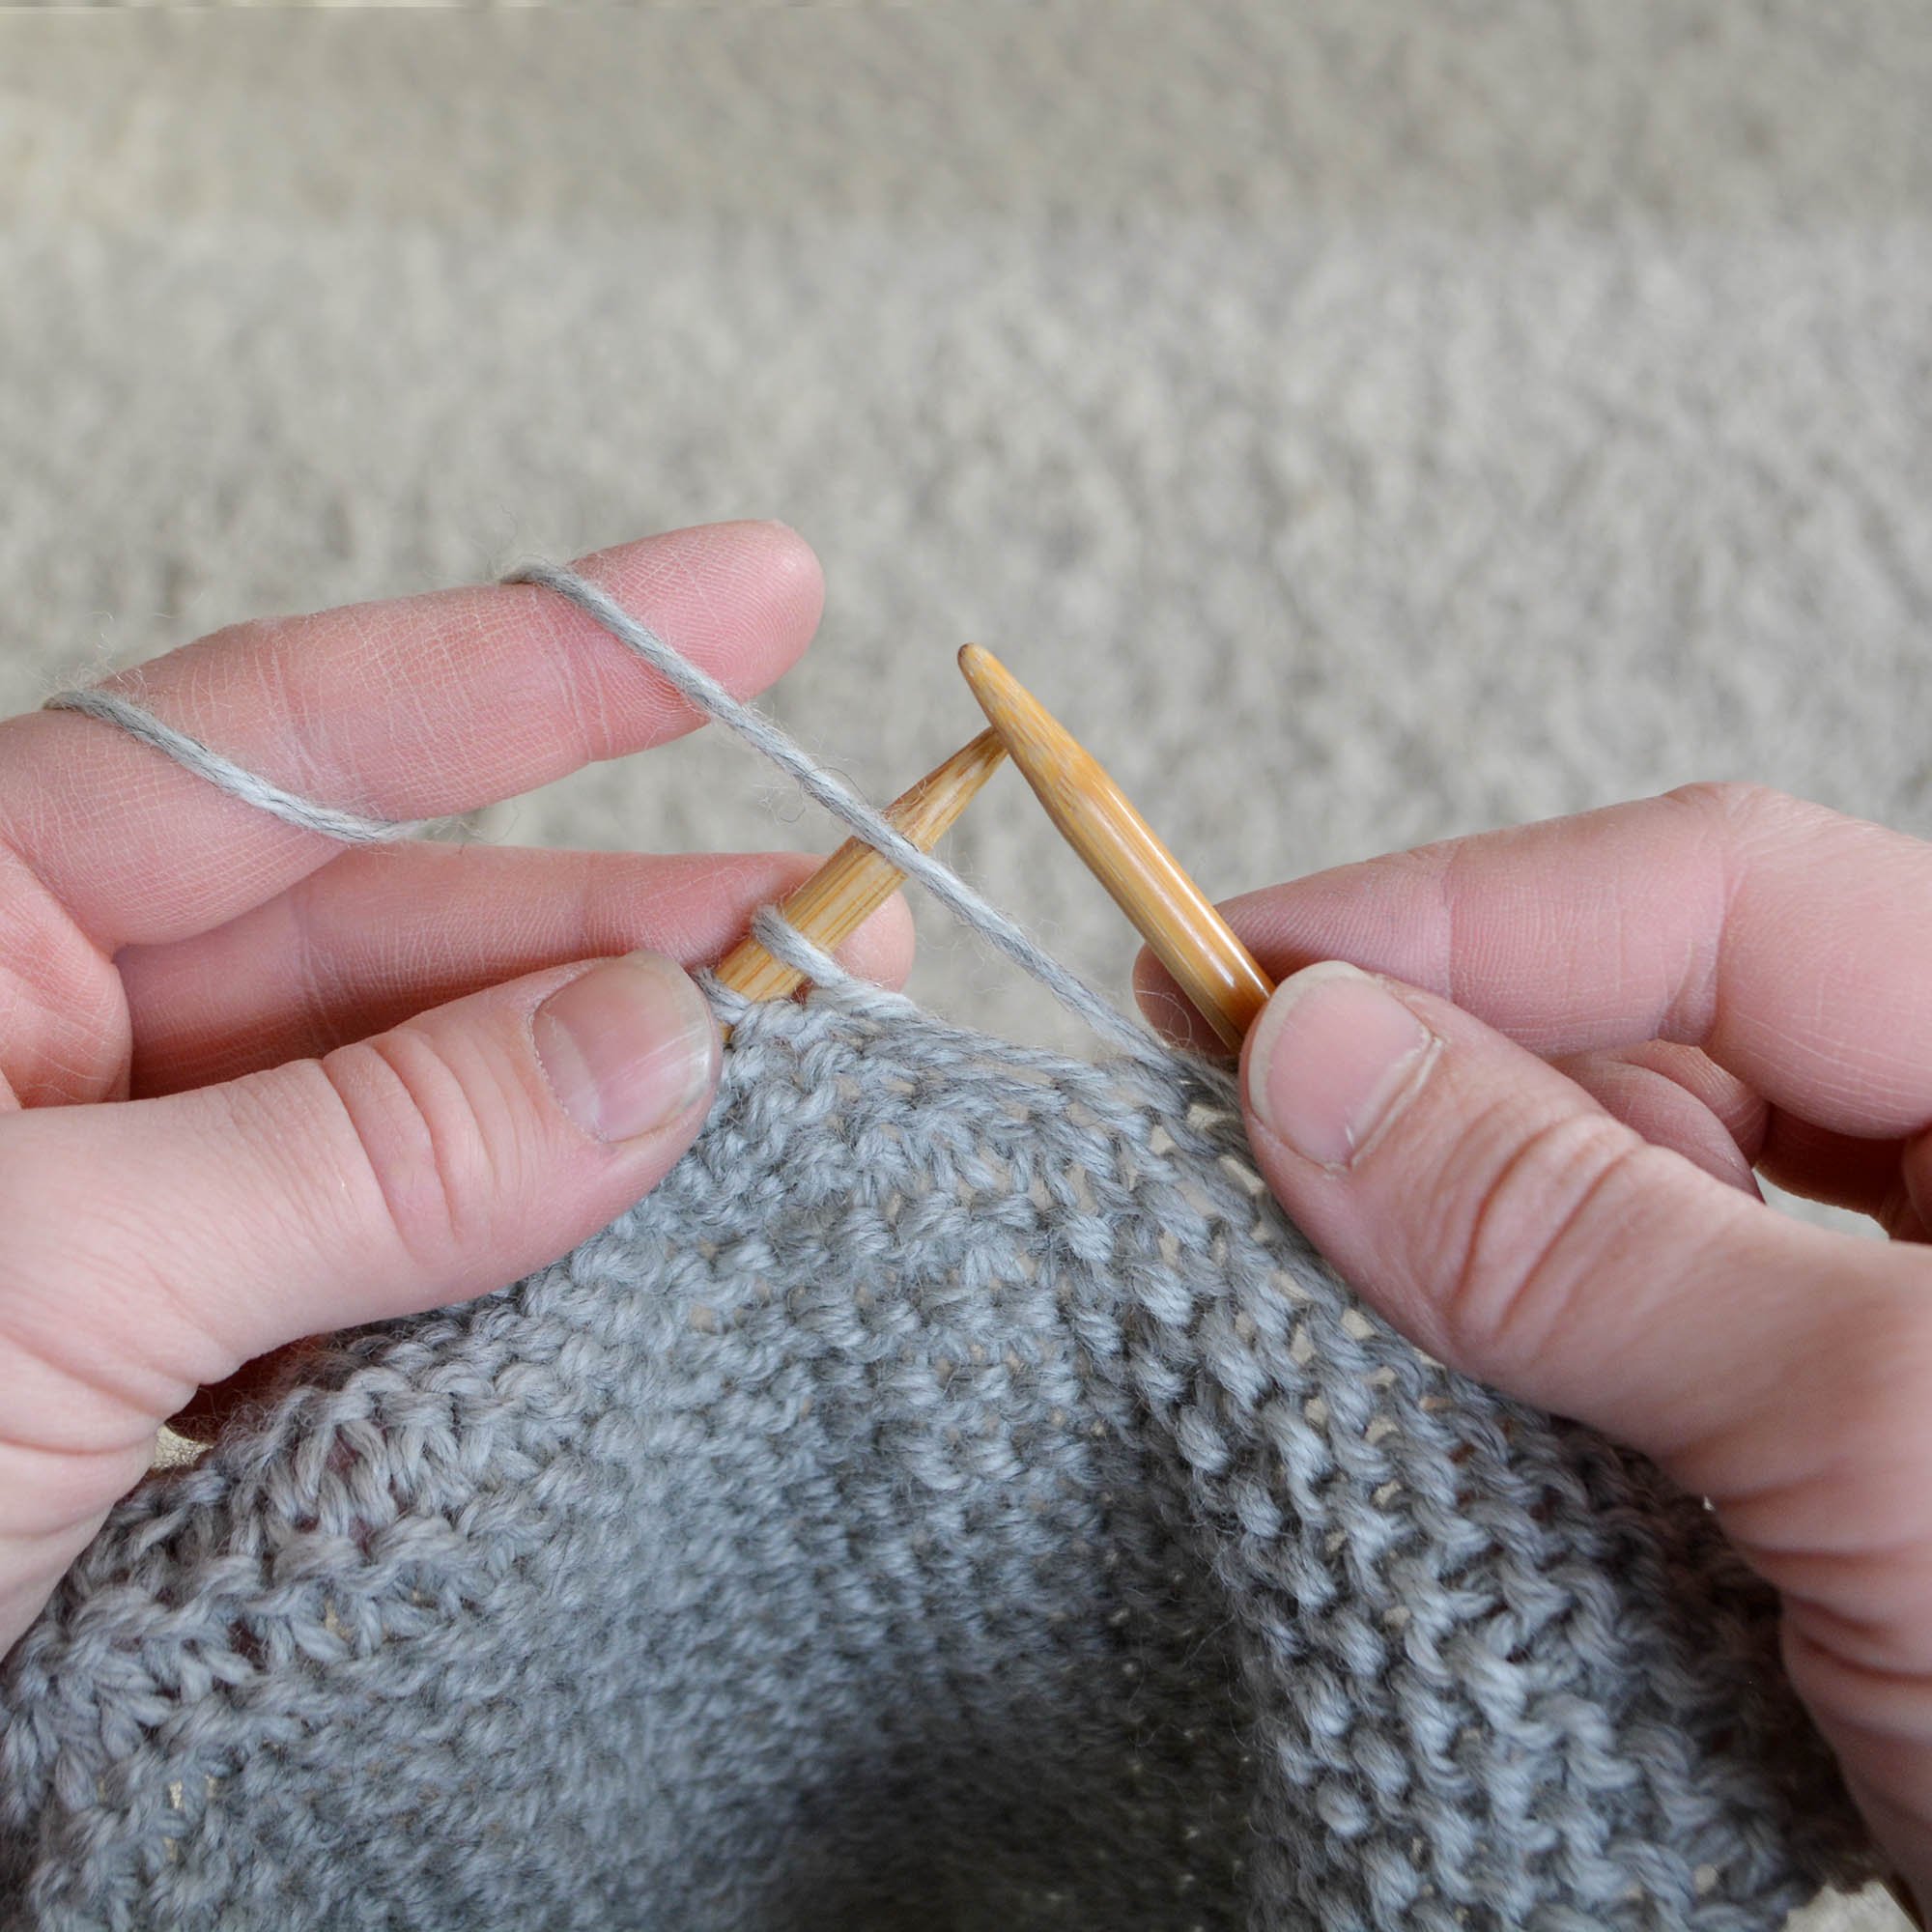
Step One:
Hold working yarn* in front of needles. Unless this is your first stitch on the row, the yarn will be coming from the working needle (the one in your dominant hand you are working onto) and going to your non-dominant hand, which is how you maintain tension. Keep it taut.
*Working yarn means the yarn you are creating new stitches with, as opposed to the tail end at the beginning of your cast on row. If you have wrapped your hand properly for Continental-style knitting, it will be going in front of the non-working needle from the last stitch on your working needle to your wrapped hand OR from the first stitch on the non-working needle (if this is a new row).
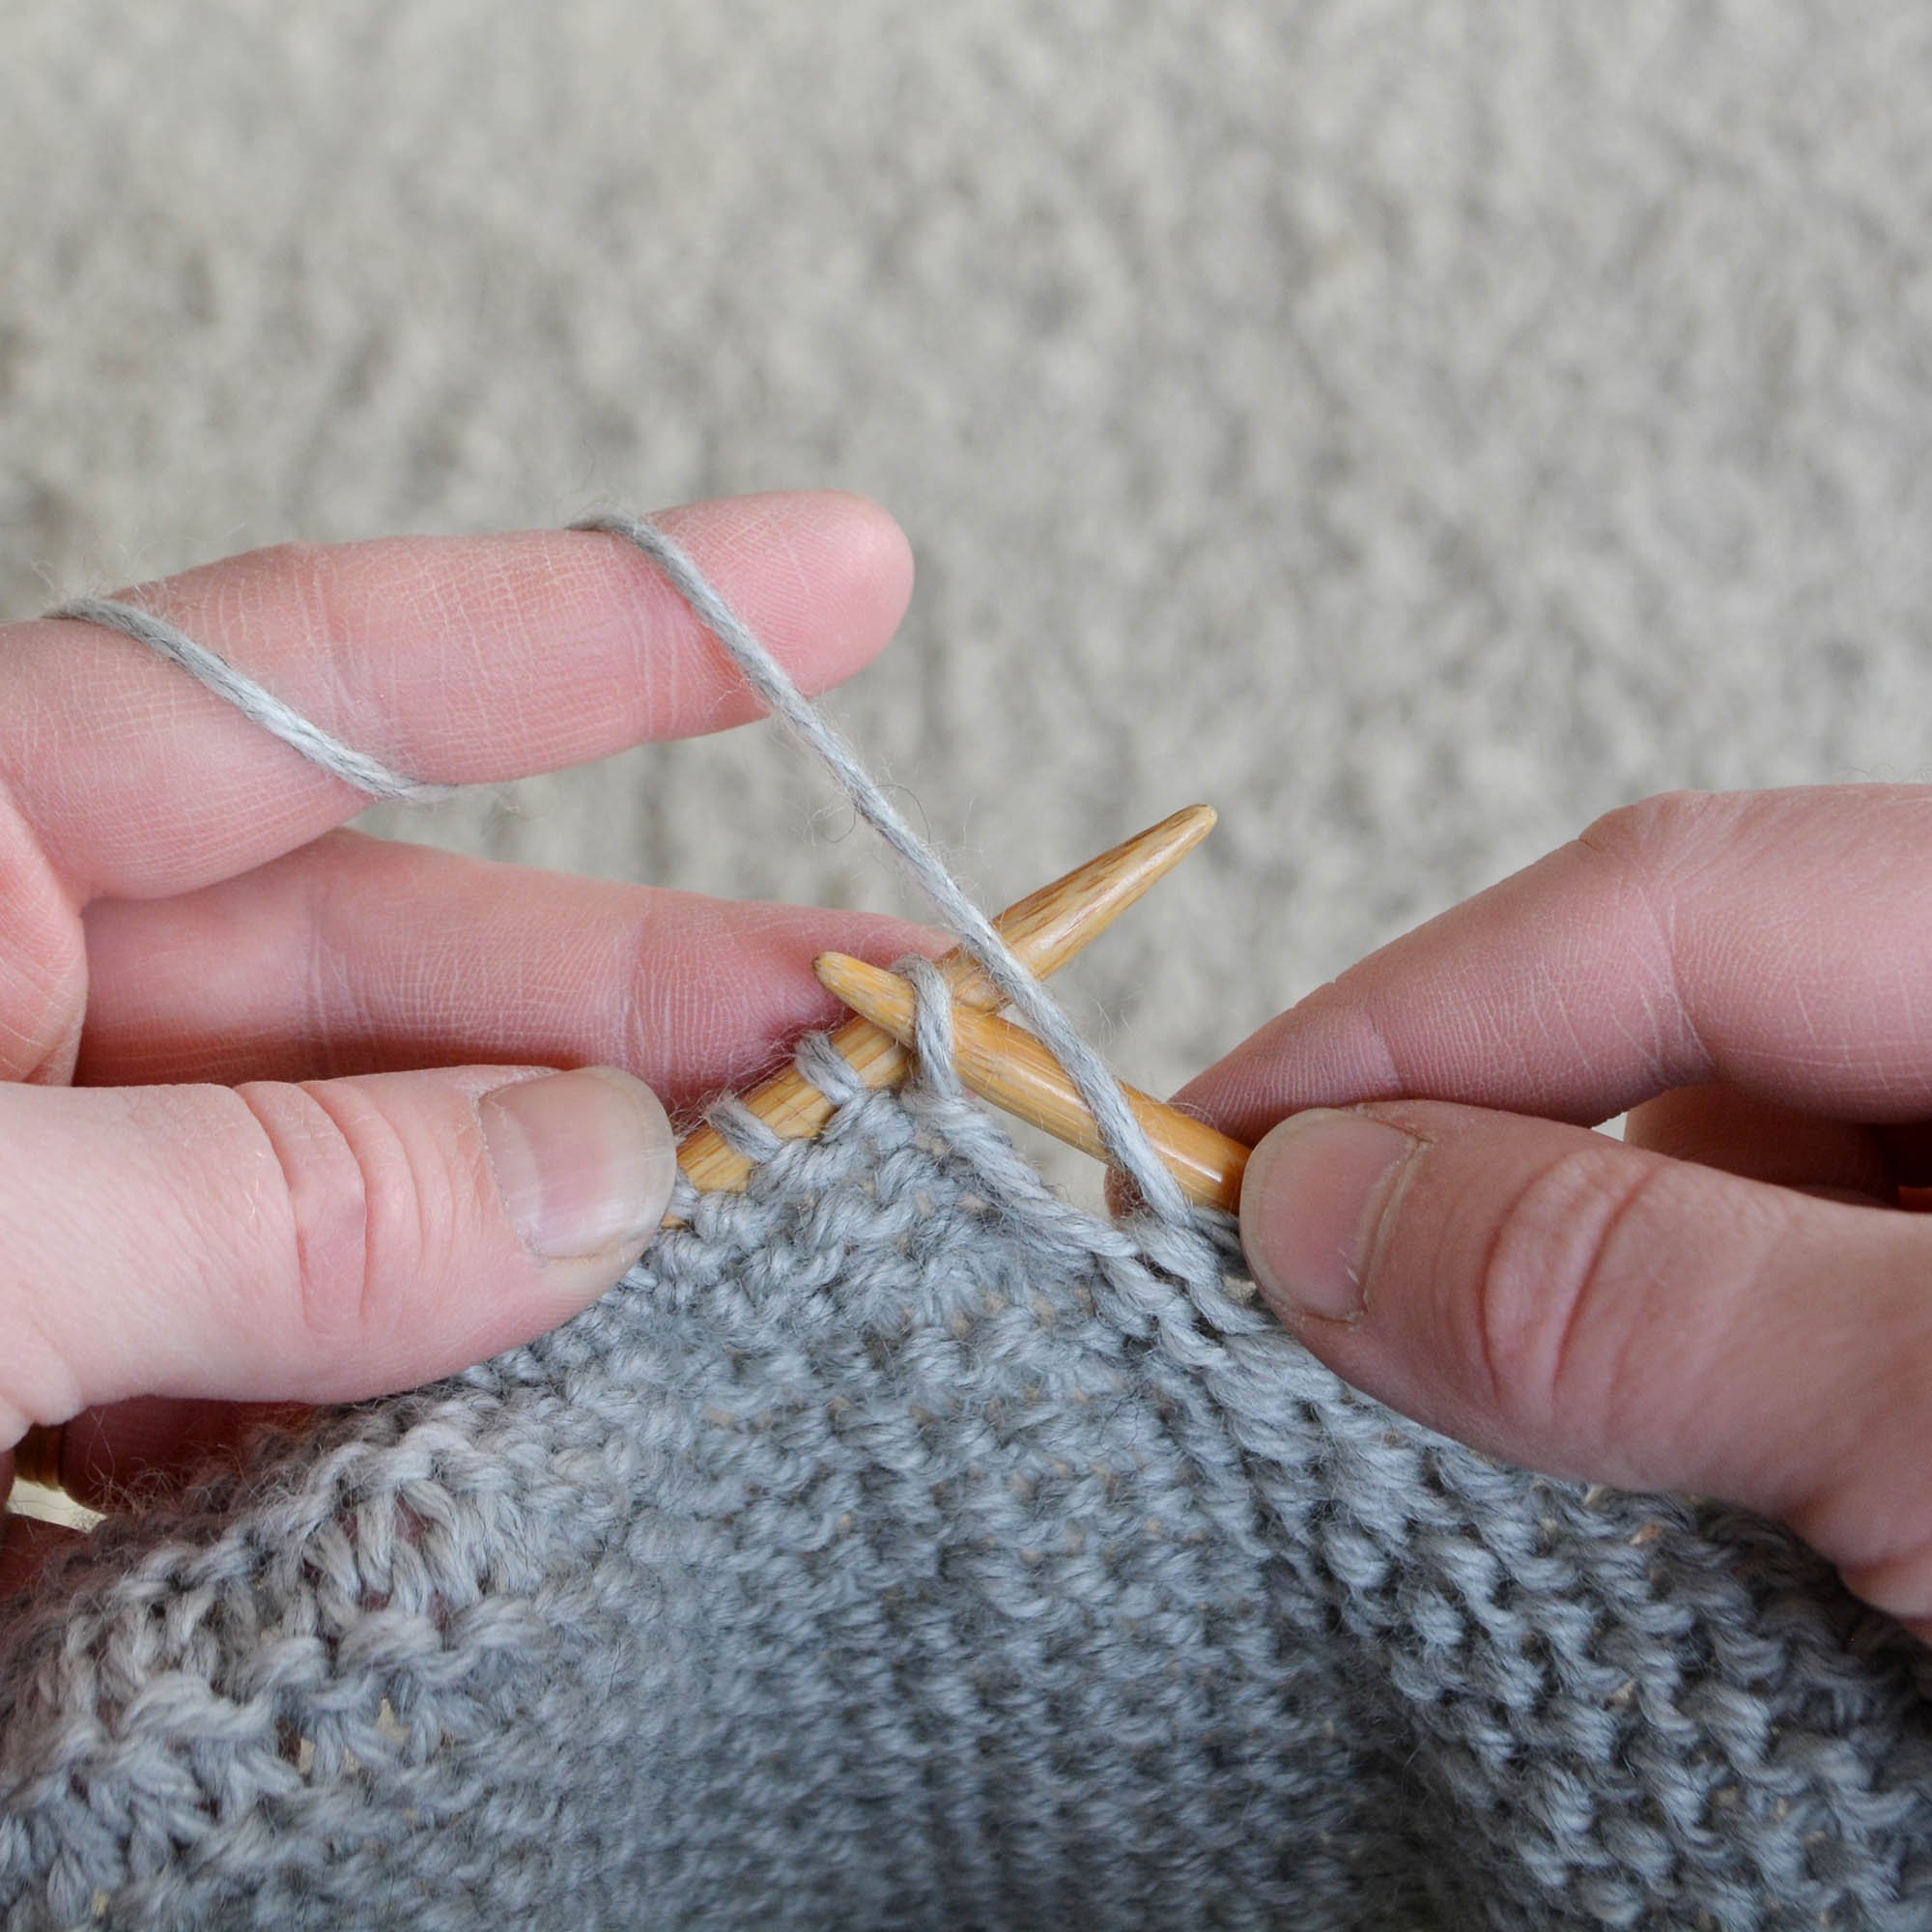
Step Two:
Keeping the working yarn in front of your work, insert the working needle into the front leg of the first stitch on the non-working needle from the tip end to the back end (toward the other stitches in the row). (Righties: Your working needle will be going from right to left. Lefties: Your working needle will be going from left to right.)
Working needle should be in front of the non-working needle.

Step Three:
Use non-dominant hand index finger to move the working yarn down between the needles from the tip end of the non-working needle toward the back end and from top to bottom. (Righties: From right to left; Lefties: From left to right.) Keep taut.

Step Four:
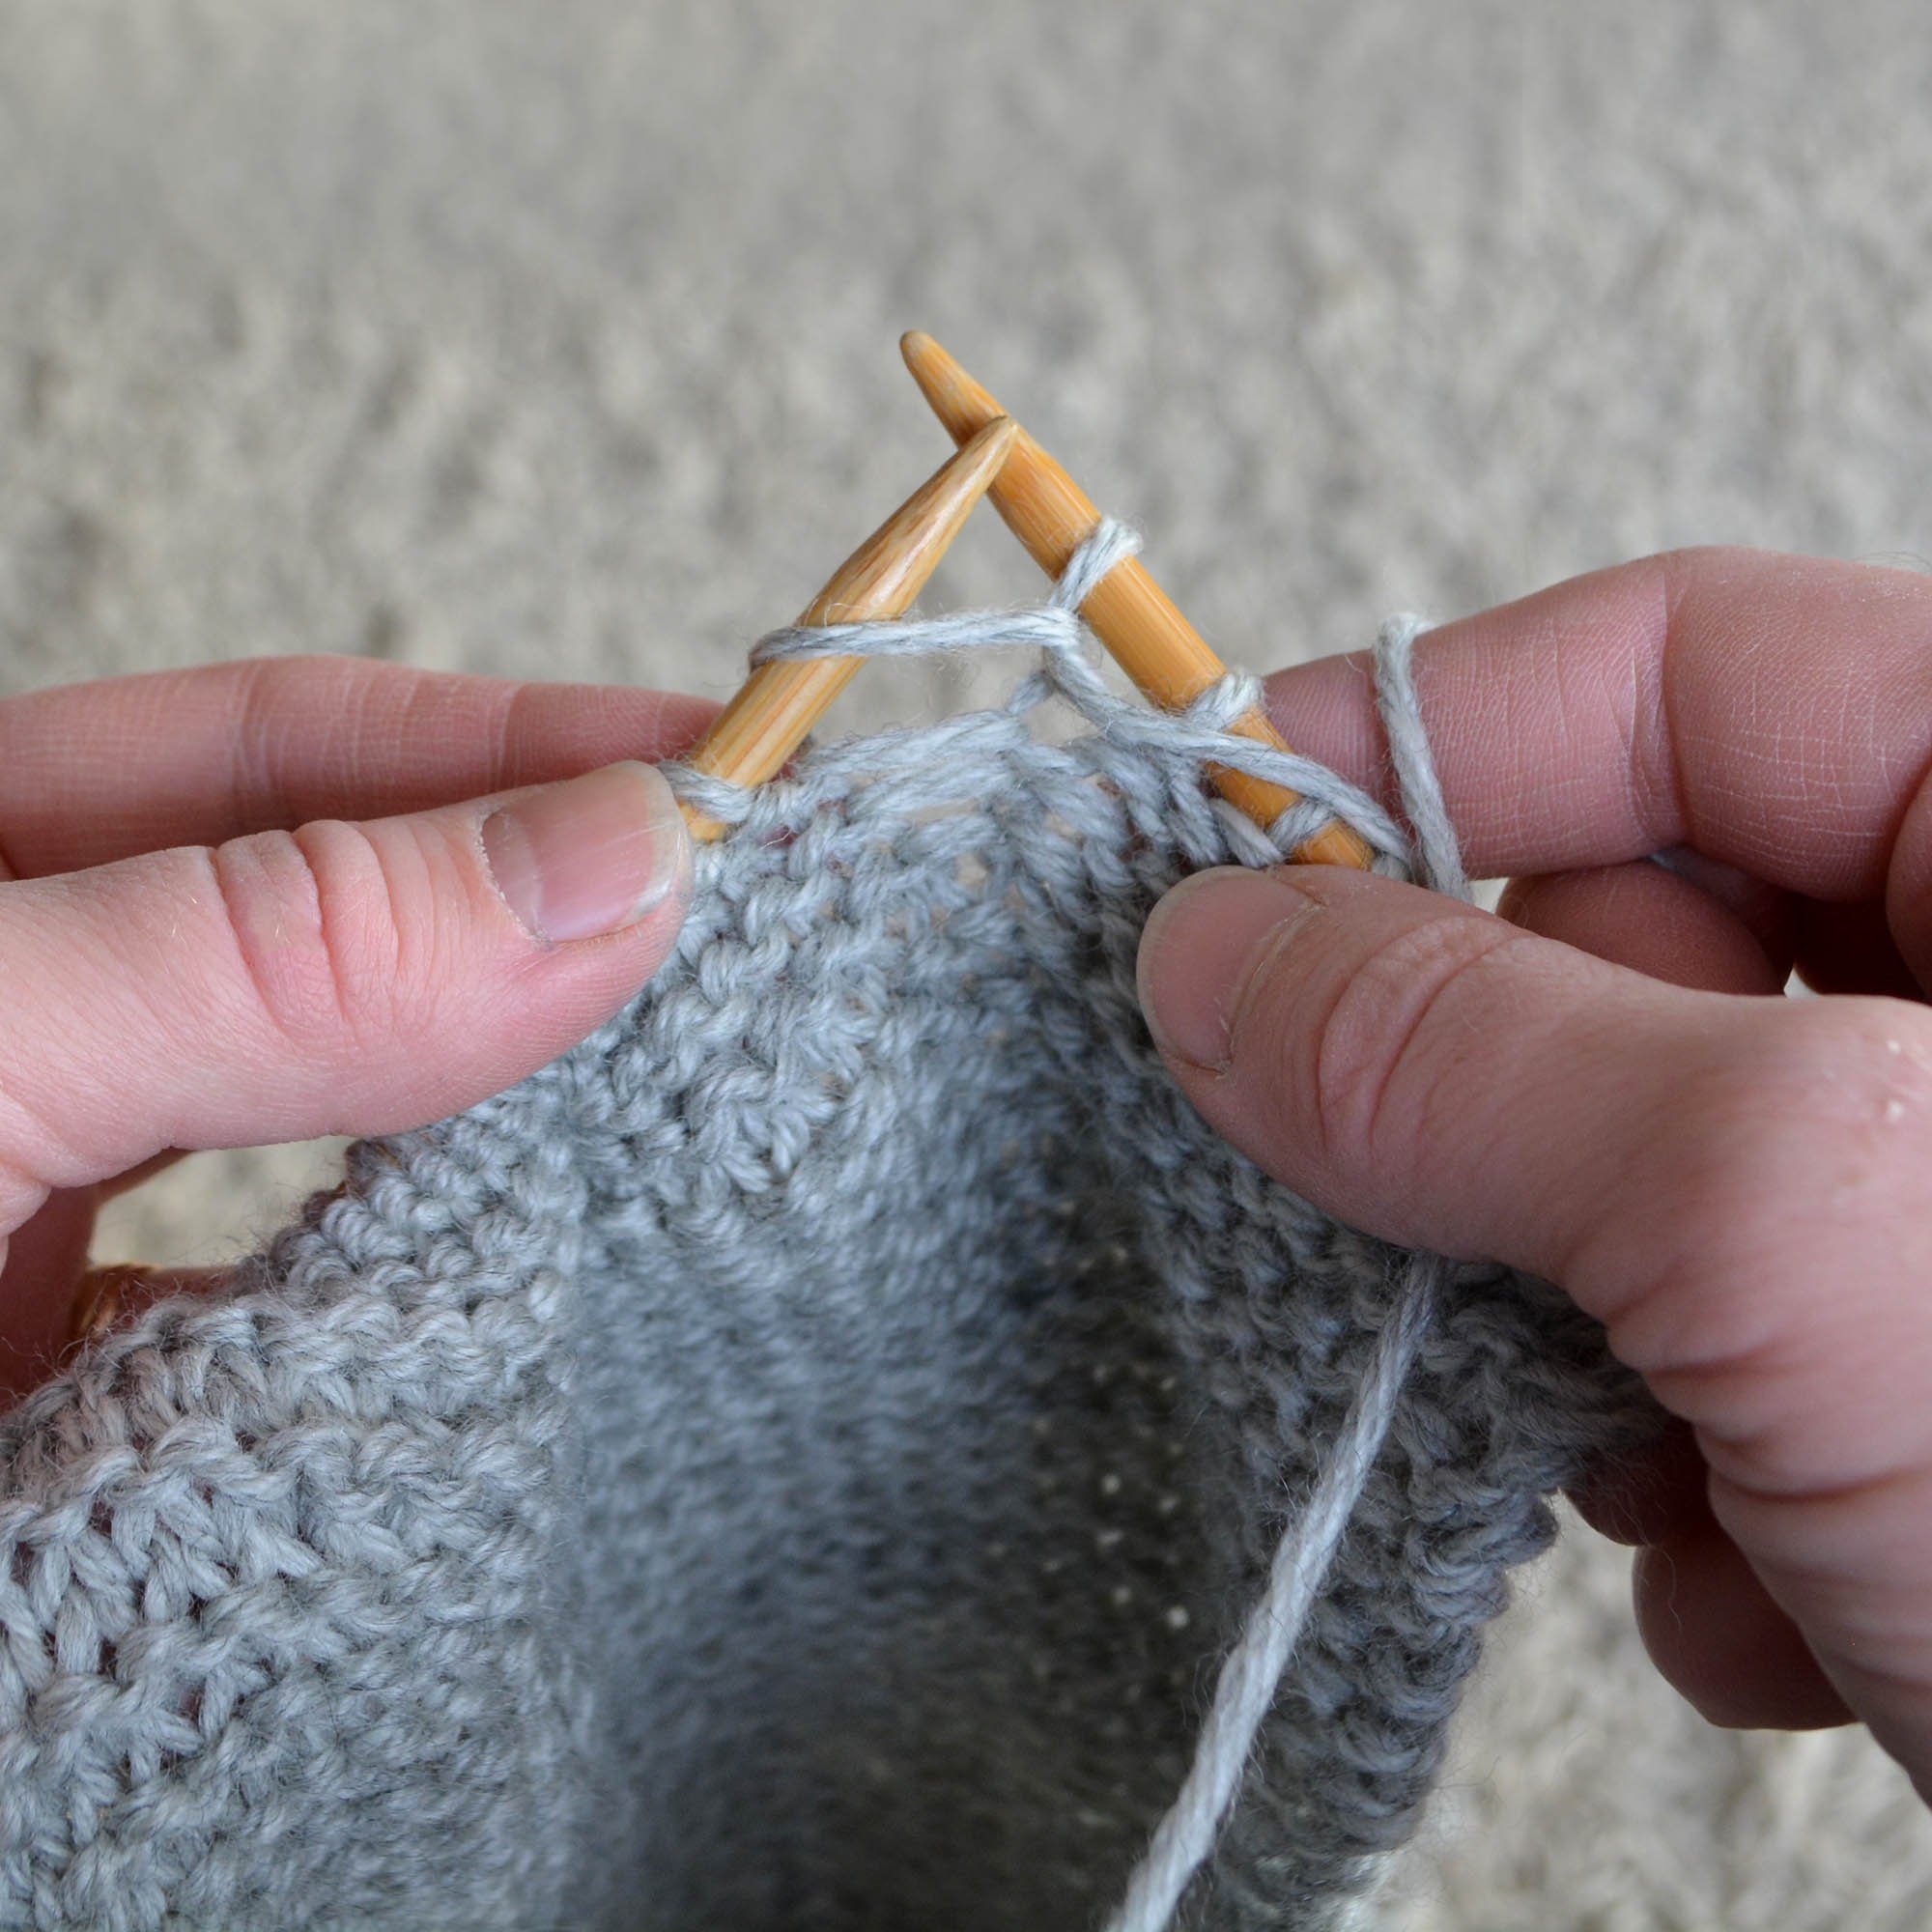
Keep needles at right angles to each other. Use tip of working needle to draw working yarn through the stitch away from you toward the far side of work.

Step Five:
Use your working needle to draw the original stitch off the non-working needle, keeping a finger from the non-dominant hand on the other stitches to prevent them coming off too.

Step Six:
You have now created a new purl stitch.
American/English Style Purling
Jump to Continental-Style Tutorial
In American (also known as English) style, the working yarn is held in the right hand. To create proper tension, pull on the yarn after wrapping. Please see Holding the Yarn.

Step One:
Hold working yarn in front of needles, keeping taut. Unless this is your first stitch on the row, the yarn will be coming from the working needle and going to your dominant hand, which is how you maintain tension.

Step Two:
Keeping the working yarn in front of your work, insert working needle into front leg of first stitch on non-working needle from outside (near the non-working needle tip) to inside (toward the other stitches in the row) in front of non-working needle. (Righties: Your working needle will be going from right to left. Lefties: Your working needle will be going from left to right.)

Step Three:
Use dominant hand to move yarn between needles from tip end of working needle toward the back end and from top to bottom. (Righties: From right to left; Lefties: From left to right.) Keep taut.

Step Four:
Keep needles at right angles to each other. Use tip of working needle to draw working yarn away from you through the stitch toward the far side of work.
Step Five:
At this point, you have a new stitch on the working needle coming from the original stitch on the non-working needle.

Step Six:
Use your working needle to draw the original stitch off the non-working needle, keeping a finger from the non-dominant hand on the other stitches to prevent them coming off too.
You have now created a new purl stitch.