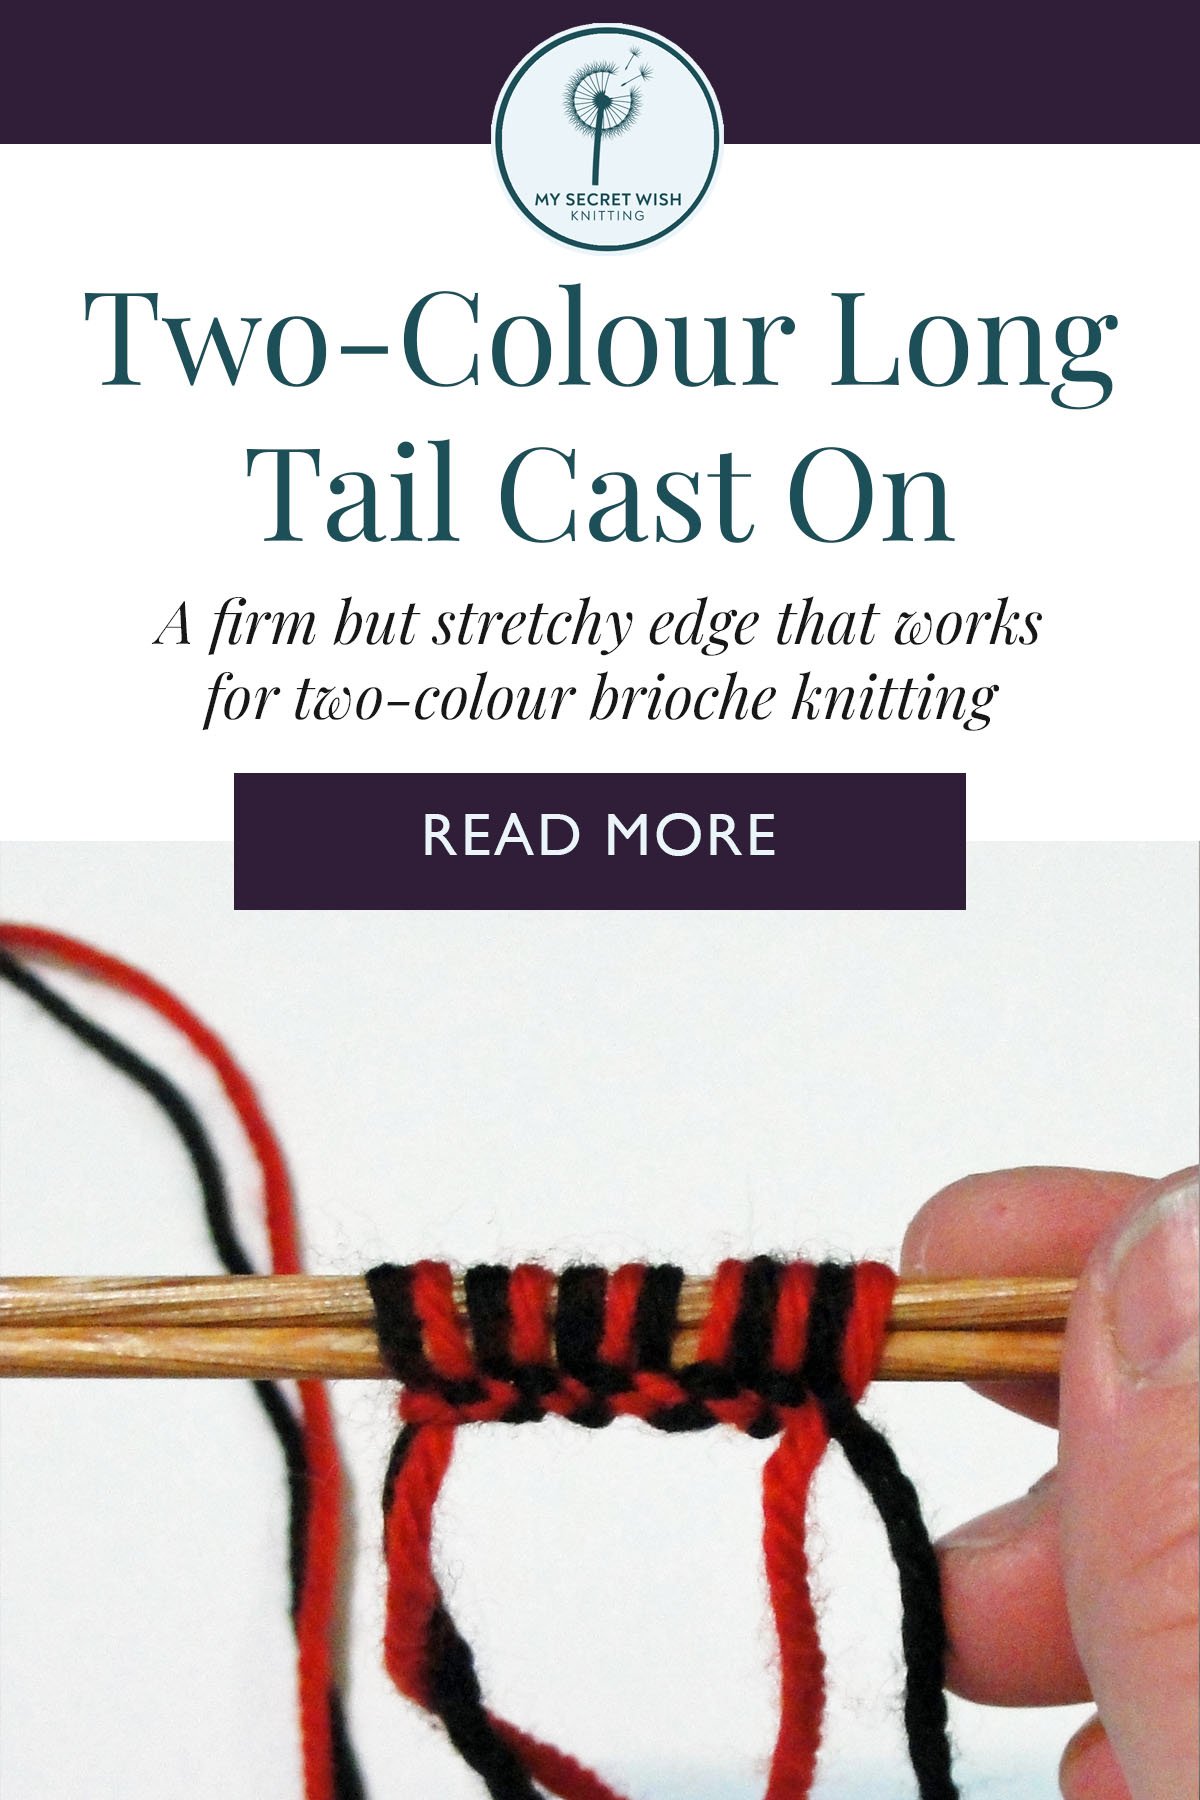
Two-Colour Long Tail Cast On
A firm but stretchy edge that works for two-colour brioche knitting projects
The two-colour long-tail cast on (or two-color long tail cast on for my American readers) works well for starting two-colour brioche knitting projects in the round and more. For brioche projects, either use a needle three sizes larger than your project calls for, or cast on over two of the project-size needles, as shown here.
This variation makes the bottom “nubs” all one colour on one side, and the other colour on the opposite side. To have the colours alternate on both sides, use this same method, except start with colours reversed. Do Steps 1 & 2, then skip to step 6. After adding each stitch, change the position of the yarns, and ONLY pick up stitches through the loop on your thumb.
How to do it:
Text included in the images is written out below each step to make this Low Vision Accessible. Instructions on the images are for right-handed people. Instructions in the written text is non-hand specific.
Basic Principle:
You will be using two different-coloured strands of yarn to create alternating-colour stitches by creating a loop in one colour yarn that will serve as the base for the stitch of the opposite colour which you pull through it. Then you will switch and make the opposite colour stitch. In other words, the base or anchor of any given cast on stitch is a loop in the opposite colour yarn.

Step One:
Holding two strands of yarn together as one, make a slip knot. Make sure it tightens when you pull on the ball end of the yarn, not the tail end.

Step Two:
Put loop of slip knot around two needles held together in your dominant hand and tighten until snug. (Cast on over two needles to keep it loose.)
Keep the tail ends out of the way by holding them next to the needles. Grab the tail ends of the yarn in the fourth and fifth fingers of the non-dominant hand, pressing them against your palm. Insert your non-dominant thumb and forefinger between the two strands of yarn, then flip your hand over so the palm is upward while widening the thumb and forefinger into a U.
The yarn should now be coming from the slip knot around the needles in your dominant hand, through the centre of the U in your non-dominant hand, with one strand of yarn each travelling around the back of your thumb and forefinger and into your palm. The Light Colour, or LC, should go over your forefinger, and the Dark Colour, or DC, should go over your thumb.
Holding the ends of the yarn in your non-dominant palm keeps tension on the yarn. Throughout the cast-on process, use these to keep the yarn taut.

Step Three:
While keeping yarn taut, move the tips of the needles outward, then inward to catch the LC yarn trailing from the back of the index finger to your palm. Pull the yarn toward you to create a loop in the LC yarn.
The needle tips should be passing through the loop toward the centre of the U between your thumb and forefinger on your non-dominant hand.

Step Four:
Move the tips of the needles toward your body past the thumb, then back toward the centre of the U, catching the DC yarn section between your non-dominant thumb and palm as you move the needles back through the LC loop. Be sure you are keeping the yarn taut.

Step Five:
Release the LC loop from around your forefinger, then pick up the LC yarn again so it travels from the needles through the centre of the U and around the back of the forefinger.
Tug on the needles in your dominant hand and the yarn in your non-dominant hand to tighten the stitch around them. You have just created a DC stitch.

Step Six:
Now we’re going to create an LC stitch.
Move needle tips toward your body past the non-dominant thumb, then move them back toward the centre of the U while catching the DC yarn between the back of your thumb and your palm. This will press that section of the yarn against the DC yarn between the needles and your thumb, creating a loop in the DC yarn.

Step Seven:
With the tips of the needles, circle around outside the LC yarn leading to your forefinger, then move them back toward your body, catching the LC yarn between your finger and the needles as you do so. Pull the LC yarn back through the DC loop (toward your body).

Step Eight:
Release the loop from around your thumb, then pick up the DC yarn with your thumb again so it goes from the needles, through the centre of the U, and around the back of the thumb. Tug on the needles and yarn ends to tighten the new LC stitch on the needles.

Step Nine:
Repeat from step three. After you have cast on several stitches, pull your original slip knot off the needles.

Step Ten:
Cast on required number of stitches, remove one needle, and you’re done!
